Go back
Wing Chun Levels 1-10
This is an in-depth Traditional Wing Chun program that takes you through all the requirements for Levels 1-10 of the System. Master Mazza has been putting together and training this program for for ov... Read More

Wing Chun Levels 1-10
461 On-Demand Videos
4 Attached Files
Wing Chun Levels 1-10
On-Demand
1
Chapter 1 Wing Chun Level 1 Training

Level 1 Grade 1 - Exercise 1 Sil Lim Tao 小念頭 (opening to fist)
On-Demand
Sil Lim Tao 小念頭 (opening to fist) Level 1
In this video you will learn why you are doing this part of the form and how to apply it. The explanation is simple and the application is effective.

Level 1 Grade 1 - Exercise 2The Sil Lim Tao through the first Wu Sao
On-Demand
This Video demonstrates The Sil Lim Tao through the first Wu Sao and demonstrates how to apply it in a self defense situation

Lev1 Grade 1 - Exercise 1 Stance Training
On-Demand
In this video you will learn a detailed intro to the first stance in level 1 training for Traditional Wing Chun. It’s all in the details. Take your time and explore each part of the stance.

Lev1 Grade 1 - Exercise 2 Wing Chun Level 1 Stance Holding
On-Demand
This Video Introduces the Wing Chun practitioner to stances and stance holding to help strengthen the body and the develop the martial mind and will power

Lev1 Grade 1 - Exercise 3 Side Neutral Stance 偏身馬pin san ma Explained Level 1
On-Demand
偏身馬pin san ma / 側身馬jak san ma - side neutral/ side body stance, done left - jo左 and right- yau右. This stance is a pre contact stance which really allows a great range of movement before entering the contact phase with an opponent.

Lev1 Grade 1 - Exercise 4 Forming The Wing Chun Fist日字衝拳-Yat jee chung kuen Level 1 Forming
On-Demand
Lev1 Grade 1 - Exercise 6 Numeric Punching
On-Demand
This video explains numeric punching in the Wing Chun System

Lev1 Grade 1 - Exercise 5 1/2 Side Step 偏身步Pin San Bu Explained Level 1
On-Demand
This video explains lateral movement in the level 1 training of Wing Chun

Block 2 Techniques - Exercise 3 Chain Punching
On-Demand
Here’s a clear explanation of an exercise that has been watered down by kung fu movies and YouTube masters.
The Roll or Chain punch is a practical and effective exercise when done with correct mental and physical alignment.
Training you basic mechanics of any art you practice will create an optimal environment for proper learning.
Take your time and practice daily.

Block 2 Techniques - Exercise 1 Lap Sao
On-Demand
The Wing Chun technique known as Lap Sau. It is also known as the Grabbing Hand (or Pulling Hand) technique. This technique allows a Wing Chun student to grab an opponent's arm in order to deflect a potential attack or to pull him offline and/or disrupt his balance.

Block 2 Techniques - Exercise 2 Half side step Pak Sao Punch
On-Demand
Half side step Pak Sao punch Level 1
Learn to evade a direct punch with this simple yet effective drill. You will develop great hand, eye and foot coordination with consistent practice. I if you don’t have a partner, just practice each step in the air and imagine someone is actually throwing a punch at you. Practice slowly so that you develop the proper structural alignment. Enjoy.

Block 2 Techniques - Exercise 4 1/2 front step Pak Sao Punch
On-Demand
This Video explains the 1/2 front step pak sao punch and its application for level 1

Block 2 Techniques - Exercise 5 Pak Sao Punch and Chain punching
On-Demand
This video explains hoe the pak sao punch and chain punching works together in application

Block 2 Techniques - Exercise 6 Wu Sao or Guarding Hand to apply the pak sao punch
On-Demand
This video explains and demonstrates how to use the Wu Sao or Guarding Hand to apply the pak sao punch

Block 2 Techniques - Exercise 7 Lap Sao, chain punch
On-Demand
This video demonstrates and explains combining three aspect of Wing Chun, the lap sao, the 1/2 front step and chain punch in application

Block 2 Techniques - Exercise 8 Shadow boxing.
On-Demand
This Video introduces the wing Chun practitioner to shadow boxing. Shadow boxing drills help to train coordination and help to develop fluidity in the practitioner.

Block 2 Techniques - Exercise 9 Light Sparring
On-Demand
Wing Chun Level 1 Light Sparring
This video demonstrates the level a practitioner should reach by the time they complete level 1 training. by pressure testing or techniques you are able to make bench marks as to your level of improvement

Block 4 - Exercise 1 Qigong 气功 for Sil Lim
On-Demand
Qigong 气功 for Sil Lim Tao pt.1 Level 1
In this Qigong exercise we are focusing our awareness on multiple points in the body in order to create a proper pathway for the energy to flow. This energy is expressed through the alignment points, the breath and then guided with the mind. The state of the body is both active and relaxed. Only through daily practice will you understand how the alignment, the breath-work and mindset all connect. Spend at least five minutes on each side and gradually add time either daily or weekly depending on how much time you have to practice. Each day or week you can add a minute or just pick a number that works best for you.
2
Chapter 2 Wing Chun Level 2 Training

Block 1 Training Drills - Exercise 1 Training Drills
On-Demand
Wing Chun Level 2 Training Drills
This Video all the basic training drills in the level 2 Wing Chun curriculum. These drills will help you to develop speed, power, coordination, fluidity, and precision when training your techniques

Block 2 - Exercise 1
On-Demand
Full side step Pak Sao Punch Chain Punch Wing Chun Level 2
This video demonstrates the Wing Chun level 2 Full Side Step Pak Sao Punch and how to apply it in a self defense situation

Block 2 - Exercise 2
On-Demand
1/2 Side Step Defense Lap Sao Punch Pak Sao Punch Wing Chun Level 2
This Video Demonstrates the 1/2 side step Pak Sao Punch Lap Sao Punch with its application

Block 2 - Exercise 31/2 front step Lap Sao Punch Pak Sao Punch
On-Demand
1/2 front step Lap Sao Punch Pak Sao Punch to Attack
This Video demonstrates how to apply the 1/2 front step Lap Sao Punch Pak Sao Punch techniques for offense
Block 2 - Exercise 4
On-Demand
1/2 side step PaK Sao Punch Lap Sao Punch Defense Wing Chun Level 2
This video demonstrates 1/2 side step PaK Sao Punch Lap Sao Punch Defense for Wing Chun Level 2

Block 2 - Exercise 5
On-Demand
1/2 front step Pak sao Punch Lap Sao Punch for Attack

Block 2 - Exercise 6
On-Demand
Defend a Round Punch Parallel Lap Sao Punch - Gan Sao Punch Wing Chun Level 2
Defend a Round Punch Parallel Lap Sao Punch - Gan Sao Punch For Wing Chun Level 2

Block 2 - Exercise 7
On-Demand
Defend Round Punch Cross Arm with Pak Sao Wing Chun Level 2
Defend Round Punch Cross Arm with Pak Sao For Wing Chun Level 2

Block 2 - Exercise 8
On-Demand
Defend Low Round Punch with Gan Sao Wing Chun Level 2

Block 2 - Exercise 9 Defend Straight Punch Parallel Lap Sao
On-Demand
Defend Straight Punch Parallel Lap Sao Punch Wing Chun Level 2

Block 3 - Exercise 1 Wooden Dummy Set 1 with 2 man Set Application
On-Demand
Wooden Dummy Set 1 with 2 man Set Application
Wooden Dummy Set 1 Demonstrated on the Dummy, in the air and with a partner

Block 3 - Exercise 2 Sil Lim Tao Fuk Sao application
On-Demand
Wing Chun Level 2 Fuk Sao application from Sil Lim Tao
This video takes you through the application of Fuk Sao from The Sil Lim Tao Form. We demonstrate it as a defense against a straight punch

Block 3 - Exercise 3
On-Demand
Wing Chun Level 2 Gum Sao Application in The Sil Lim Tao Form
This video demonstrates the application of the Gum Sao In the Sil Lim Tao form. Here it is demonstrated for a kick defense

Block 3 - Exercise 4
On-Demand
Wing Chun Level 2 Sil Lim Tao Reverse Palm Strike Application
This video Applies the Gum Sao and Reverse Palm Strike in an application of self defense against a bear hug

Block 3 - Exercise 5 Sil Lim Tao
On-Demand
Wing Chun Level 2 Fut Sao Application for the Sil Lim Tao Form
This video demonstrates the application the Fut Sao from the the Sil Lim Tao Form. Here we demonstrate it in both an offensive and defensive posture

Block 3 - Exercise 6 Sil Lim Tao
On-Demand
Wing Chun Level 2 Lan Sao Application to Sil Lim Tao
This Video demonstrates a application to the Lan Sao from the Sil Lim Tao Form. Here we demonstrate how it can be applied as choke

Block 3 - Exercise 7 Sil Lim Tao
On-Demand
Wing Chun level 2 Tan-Jut Biu Sao application of the Sil Lim Tao Form
This Video demonstrate how to apply the Tan-Jut-Biu Sao section in the Sil Lim Tao Form here we demonstrate it against a straight and round punch
Block 3 - Exercise 8 Sil Lim Tao Gum Sao Dahn Sao Application
On-Demand
Wing Chun Level 2 Gum Sao Dahn Sao Application to the Sil Lim Tao
This video demonstrates application to the Gum Sao - Dahn Sao section in the Sil Lim Tao Form. Here we demonstrate its use against a front kick and round punch
3
Chapter 3 Wing Chun Level 3 Training

Block 1 Eye Exercises - Exercise 1 Basic Eye Drill Warm ups
On-Demand
Eye Exercise to enhance you visual acuity. These drills will greatly help your martial arts and sports training. These drills greatly enhance you visual acuity. That is your ability to Pericles something and be able to react to it.

Block 1 Eye Exercises - Exercise 2 l Proximal drills
On-Demand

Block 1 Eye Exercises - Exercise 3 Peripheral vision exercises
On-Demand
These exercises help to expand your peripheral field of vison
Block 2 Technique Drills - Exercise 1
On-Demand
This drill Takes you through the 1/2 front step jut sao punch chain punch from level 3.0

Block 2 Technique Drills - Exercise 2
On-Demand
This video demonstrates the Level 3.0 drill Jut Sao punch Chain punch from a flat neutral

Block 2 Technique Drills - Exercise 3
On-Demand
This Video Demonstrates the level 3.0 Drill scoop to lead Pak Sao Punch Chain Punch

Block 2 Technique Drills - Exercise 4
On-Demand
This Video demonstrate the 1/2 side step Biu Sao Front kick from the level 3.0 training drills

Block 2 Technique Drills - Exercise 5
On-Demand
This video demonstrates the Biu sao shuffle front kick which is used to close the distance on a opponent

Block 2 Technique Drills - Exercise 6
On-Demand
This video demonstrates how to properly perform The Tan Sao Punch From a front stance

Block 2 Technique Drills - Exercise 7
On-Demand
This video demonstrates the Biu Sao front kick off the rear leg. This technique is also used to close the distance on your opponent

Block 2 Technique Drills - Exercise 8
On-Demand
This video demonstrates the bon sao lap sao drill from level 3.2

Block 2 Technique Drills - Exercise 9
On-Demand
The video teaches the Wing Chun Level 3.2 drill Pak Sao Punch Tan Sao Punch

Block 2 Technique Drills - Exercise 10 Pak Sao Bong Sao Lap Sao punch drill
On-Demand
This video demonstrates the Pak Sao Bong Sao Lap Sao punch drill from level 3.2 in Wing Chun

Block 2 Technique Drills - Exercise 11 Pak Sao punch -Biu Sao punch
On-Demand
This video teaches the Wing Chun level 3.2 drill pak sao punch - biu sao punch

Block 3 Self Defense - Exercise 1 Defend a shoulder grab
On-Demand
This video teaches you how to respond when a person grabs your shoulder from behind.
Block 3 Self Defense - Exercise 2 Defense against a shoulder grab from the front
On-Demand
This video reviews the self defense reaction to a shoulder grab from the front

Block 3 Self Defense - Exercise 3
On-Demand
Level 3 self defense technique against a 2 hand choke from the front.

Block 4 Techniques - Exercise 1
On-Demand
Technique defend a double round punch parallel high and low with biu sao and gan sao
Block 4 Techniques - Exercise 2 Pack Sao Biu sao
On-Demand
Technique defend a double round punch parallel high and low with biu sao and gan sao
Block 4 Techniques - Exercise 3
On-Demand
level 3 technique defend low round punch with gan sao

Block 4 Techniques - Exercise 4
On-Demand
Level 3 technique self defense against a high round punch on the parallel side using T step biu sao.

Block 4 Techniques - Exercise 5
On-Demand
Level 3 technique defend a round punch cross arm using T step pak sao front kick.

Block 4 Techniques - Exercise 6 Defend front kick and punch parallel arm
On-Demand
Level 3 technique defend front kick and punch parallel, using pak sao and lap sao
Block 4 Techniques - Exercise 7
On-Demand
Level 3 technique defend front kick and punch cross arm using pak sao and lap sao
Block 4 Techniques - Exercise 8
On-Demand
Level 3 technique defend against a high round punch cross arm with tan sao

Block 4 Techniques - Exercise 9
On-Demand
Level 3 technique defend a double high round punch cross to parallel using pak sao and biu sao

Block 4 Techniques - Exercise 10 Defend double high round punch parallel to cross arm
On-Demand
Level 3 technique defend double high round punch parallel to cross using a Biu Da with a t step Pak Sao front kick.

Block 4 Techniques - Exercise 11 Defend against a low round punch both parallel and cross
On-Demand
Level 3 technique defend against a low round punch both parallel and cross using the low gan sao from both the man sao and we sao positions.

Block 5 Forms - Exercise 1 Sil Lim Tao Form
On-Demand
Sil Lim Tao is the first open-hand form, or taolu, of Wing Chun kung fu. The name is a transcription of the Cantonese pronunciation of the Chinese characters "小念頭" In This video I go through the whole form and what each movement is called

Block 6 Daan Chi Sao - Exercise 1 Daan Chi Sao
On-Demand
Daan Chi Sao
Daan Chi Sau . Chi Sau drills with one-armed sets called(Chinese: 单黐手 Single Sticking Hand which help the novice student to get the feel of the exercise. In Daan Chi Sau each practitioner uses one hand from the same side as they face each other
Block 6 Daan Chi Sao - Exercise 2 Daan Chi Sao Pushing Out Drill
On-Demand
Daan Chi Sao Pushing Out Drill
This video takes you through the pushing out drill from Daan Chi Sao. This drills helps to develop your forward pressure and sensitivity to energy that is not directed at you

Block 7 Cross Arm Chi Sao - Exercise 1 Pak Sao Punch
On-Demand
Cross Arm Chi Sao Technique 1
Cross Arm Chi Sao Pak Sao Punch for level 3. This video teaches you how to exploit the elbow from a posyion of contact.

Block 7 Cross Arm Chi Sao - Exercise 2 Tan Sao to counter
On-Demand
Using Tan Sao to counter Pak Sao Punch

Block 7 Cross Arm Chi Sao - Exercise 3
On-Demand
Cross Arm chi Sao Technique 3
Cross Arm Chi Sao technique 3 Lap Sao Punch. This technique demonstrates how to exploit the elbow with a lap sao

Block 7 Cross Arm Chi Sao - Exercise 4
On-Demand
Cross Arm Chi Sao technique 4. Countering the Lap Sao with Pak Sao Gan Sao. Remaining on the inside.
Block 7 Cross Arm Chi Sao - Exercise 5
On-Demand
Cross Arm Chi Sao technique 5 Pak sao Punch Gan Sao Punch

Block 7 Cross Arm Chi Sao - Exercise 6
On-Demand
Cross Arm Chi Sao technique 6
Cross Arm chi sao technique 6 pak sao punch Lao sao pak sao punch.

Block 7 Cross Arm Chi Sao - Exercise 7 Pak Sao Pu
On-Demand
Cross Arm Chi Sao Technique 7
Cross Arm chi sao technique 7 Pak Sao Punch Lap Sao Punch
4
Chapter 4 Wing Chun Level 4 Training

Block 1 Forms - Exercise 1 Advanced Sil Lim Tao
On-Demand
This is the second form of Traditional Wing Chun. This form was developed right Grandmaster Cheung. It intrudes different punching techniques and a basic throw

Block 2 Wing Chun Drills - Exercise 1
On-Demand
This video is the first in level 4.O training Biu Sao - Pak sao Front kick Chain punch

Block 2 Wing Chun Drills - Exercise 2
On-Demand
This is the second drill in Level 4.0 Training Biu Sao - Biu Sao Front kick chain punch

Block 2 Wing Chun Drills - Exercise 3 Entry Technique
On-Demand
This is the third drill in the level 4.0 training. The Entry Technique is broken down in a step by step method

Block 2 Wing Chun Drills - Exercise 4 Biu Sao low round kick
On-Demand
Biu Sao low round kick from a side neutral stance

Block 2 Wing Chun Drills - Exercise 5 Biu -Quan -Front kick Chain
On-Demand

Block 2 Wing Chun Drills - Exercise 6 Biu Sao Double Gan Sao Front kick and Chain Punch
On-Demand

Block 2 Wing Chun Drills - Exercise 7 Biu Sao- Gan Sao Punch
On-Demand
Biu Sao- Gan Sao Punch

Block 2 Wing Chun Drills - Exercise 8 Medium Round Kick 1
On-Demand

Block 2 Wing Chun Drills - Exercise 9 Medium Round kick 2
On-Demand
Shuffle mid level round kick

Block 3 Wing Chun Techniques - Exercise 1
On-Demand
Wing Chun level 4.0 Technique 3 Headlock Defense
Block 3 Wing Chun Techniques - Exercise 2
On-Demand
Wing Chun level 4.0 defend a round punch using Lap sao

Block 3 Wing Chun Techniques - Exercise 3 Defend Straight Punch with Bong sao
On-Demand
Wing Chun Level 4.0 technique defending a straight punch with Bong Sao

Block 3 Wing Chun Techniques - Exercise 4
On-Demand
Technique 4 defend a round kick using quan sao

Block 3 Wing Chun Techniques - Exercise 5 Low Bong Sao for a Front Kick
On-Demand
Defend a front kick using Low Bong Sao

Block 4 Wooden Dummy Drills - Exercise 1
On-Demand
This Video Demonstrates how too train the Pak Sao Lap Sao on the Wooden Dummy and the combat application to it.

Block 4 Wooden Dummy Drills - Exercise 2
On-Demand
Dummy Drill 2 takes you through a variation on how to apply the Pak Sao Lap Sao both on the dummy and in combat
Mark as complete
Module
Block 4 Wooden Dummy Drills - Exercise 3
On-Demand
Dummy Drill 3 on the wooden dummy introduces the Bong Sao for both attacking and defending following up with the Lap Sao side palm - Pak Sao high palm to Gan Sao mid level palm strike. This application is demonstrated both on the dummy and with a partner

Block 4 Wooden Dummy Drills - Exercise 4 Bong Sao Lap Sao to Gan Sao- Quan Sao-finishing with the Tan Sao mid level palm
On-Demand
Dummy Drill 4 adds a flowing combination of moving from the Bong Sao Lap Sao to Gan Sao- Quan Sao-finishing with the Tan Sao mid level palm strike. This combo teaches you to deal with multiple punches and teaches you how to both move around the dummy and your opponent.

Block 4 Wooden Dummy Drills - Exercise 5
On-Demand
Dummy Drill 5 Bong Sao-Lap Sao- Gan Sao- Jut Sao-Pak Sao- Tsuen Sao- Lap Sao finish mid level palm strike. This video furthers the flow of Bong Sao in series of wing Chun blocks and strikes.

Block 4 Wooden Dummy Drills - Exercise 6
On-Demand
Dummy Drill 6 Takes us from the Bong Sao Lap Sao side palm and introduces us to the Lan Sao - Gan Sao transition.

Block 4 Wooden Dummy Drills - Exercise 7
On-Demand
Dummy Drill 7 Bong Sao Lap Sao Side Palm- Biu Sao Palm Stike- Jut Sao Tsuen Sao mid level palm- Pak sao high palm

Block 4 Wooden Dummy Drills - Exercise 8
On-Demand
Dummy Drill 8 Bong Sao Lap Sao high side palm- Dahn Sao high palm- Gan Sao mid level palm

Block 4 Wooden Dummy Drills - Exercise 9
On-Demand
Dummy Drill 9 Cross arm technique Bong Sao front kick. Bong Sao Lap Sao mid level palm- Pak Sao high palm
Block 5 Daan Chi Sao - Exercise 1 Daan Chi Sao
On-Demand
Daan Chi Sau . Chi Sau drills with one-armed sets called(Chinese: 单黐手 Single Sticking Hand which help the novice student to get the feel of the exercise. In Daan Chi Sau each practitioner uses one hand from the same side as they face each other
Block 5 Daan Chi Sao - Exercise 2 Daan Chi Sao Pushing Out Drill
On-Demand
Daan Chi Sao Pushing Out Drill
This video takes you through the pushing out drill from Daan Chi Sao. This drills helps to develop your forward pressure and sensitivity to energy that is not directed at you
Block 5 Daan Chi Sao - Exercise 3 Heavy Jut Sao
On-Demand
Level 4.1 Daan Chi Sao Heavy Jut Sao. This video demonstrates how to deal with a downward pressure during chi sao but also the strategy of how to use it in real world situations.

Block 6 Entry Techniques - Exercise 1 Entry Technique 1
On-Demand
Entry technique moving from parallel to blind side. This video teaches one of the Wing Chun entry techniques used for bridging on your opponent.

Block 6 Entry Techniques - Exercise 2 Entry Technique 2
On-Demand
Moving from parallel to the open side staying inside

Block 6 Entry Techniques - Exercise 3 Entry technique cross to blind side Opponent stationary
On-Demand

Block 6 Entry Techniques - Exercise 4 Entry technique cross to open side opponent stationary.
On-Demand
Entry technique cross to open side opponent stationary.

Block 7 Bong Sao Lap Sao - Exercise 1
On-Demand
Bong Sao Lap Sao with Wu Sao

Block 7 Bong Sao Lap Sao - Exercise 2
On-Demand
Bong Sao Lap Sao with Bon Sao taking The Lap

Block 7 Bong Sao Lap Sao - Exercise 3 Bong Sao Tan Sao Punch
On-Demand
Bon Sao Tan Sao Punch

Block 8 Pak Sao Recovery Drills - Exercise 1 Pak Sao recover drill 1
On-Demand

Block 8 Pak Sao Recovery Drills - Exercise 2 Pak Sao recovery drill 2
On-Demand
Pak Sao recovery drill inside or cross arm teaches you how to deal with an opponent throwing multiple punches at you and what to do if you are cross arm.

Block 9 Bong Sao Drills With a Partner - Exercise 1
On-Demand
Level 4.2 Bong Sao Lap Sao flat neutral no footwork

Block 9 Bong Sao Drills With a Partner - Exercise 2 Bong Sao Lap Sao 2
On-Demand

Block 9 Bong Sao Drills With a Partner - Exercise 3 Bong Lap 3
On-Demand
Bong Sao Lap Sao the third exercise introduces scooping footwork coordinating it with this flow drill.

Block 10 - Exercise 1
On-Demand
Cross arm chi sao counter pak sao punch - inside lap sao

Block 10 - Exercise 2
On-Demand
Counter pak sao punch using exchange step bong sao lap sao.

Block 10 - Exercise 3 Counter Pak Sao punch using back step Pak Sao side kick
On-Demand

Block 10 - Exercise 4
On-Demand
Counter Pak Sao punch using release Pak Sao Tan Sao

Block 10 - Exercise 5
On-Demand
Defend Pak Sao punch release step Pak Sao Biu Sao

Block 10 - Exercise 6 Defend Pak Sao punch release step Lap Sao
On-Demand
Defend Pak Sao punch release step Lap Sao
5
Chapter 5 Wing Chun Level 5 Training

Block 1 Chum Kiu Form and Application - Exercise 1 Chum Kiu Form
On-Demand

Block 1 Chum Kiu Form and Application - Exercise 2 Chum Kiu Application 1 Double Biu Jee
On-Demand

Block 1 Chum Kiu Form and Application - Exercise 3 Chum Kiu Application 2
On-Demand
This video demonstrates how to apply the elbows in the opening of the Chum Kiu form.

Block 1 Chum Kiu Form and Application - Exercise 4 Chum Kiu application 3
On-Demand
This video demonstrates the first application to the Bong Sao in the first section of the Chum Kiu form. This application specifically trains two different pieces of footwork.

Block 1 Chum Kiu Form and Application - Exercise 5 Chum Kiu application 4
On-Demand
This video demonstrates a second application to the bong sao for the for the first section of Chum Kiu. In this video we identify how to deal with 2 punches applying the bong sao and the huen sao

Block 1 Chum Kiu Form and Application - Exercise 6 Chum Kiu application 5
On-Demand
This video demonstrates how to apply the arm break in the first section of the Chum Kiu form.
Block 1 Chum Kiu Form and Application - Exercise 7 Chum Kiu application 6
On-Demand
This video demonstrates the first application to the Tsuen Sao section in the Chum Kiu form.

Block 2 Bong Sao Drills - Exercise 1 Bong sao Drill 1
On-Demand

Block 2 Bong Sao Drills - Exercise 2 Bong sao drill 2
On-Demand

Block 2 Bong Sao Drills - Exercise 3 Bong Sao Drill 3
On-Demand
the bong sao lap sao drill adding in both high and low round punches randomly

Block 3 Kicking - Exercise 1 Step Forward Sidekick
On-Demand
The step forward side kick is a pursuing kick to close the distance on an opponent that retreats from you.

Block 3 Kicking - Exercise 2 Step Back Side Kick
On-Demand
Step back side kick is utilized to draw an opponent in or retreat and attack your opponent as they step in

Block 3 Kicking - Exercise 3 Step Forward Round Kick
On-Demand
The step forward round kick is a pursuit kick used to close the distance on an opponent that retreats

Block 3 Kicking - Exercise 4 Step Back Round Kick
On-Demand
The step back round kick is used as a method of retreat to draw your opponent in and attack as they step towards you.

Block 4 Entry Technique Training - Exercise 1 Wing Chun Entry Technique Training
On-Demand
This video demonstrates the four ways to train the Wing Chun Entry technique for dealing with a kicker. Demonstrating how to train the entry technique from parallel, cross, off the rear leaf and front leg.

Block 4 Entry Technique Training - Exercise 2
On-Demand
Level 5.0 Entry technique parallel to blind side with opponent responding by throwing a straight punch.
Enter on opponent’s blind side Opponent throws straight punch Cover with Pak Sao - roll punch

Block 4 Entry Technique Training - Exercise 3 Entry Technique 2
On-Demand

Block 4 Entry Technique Training - Exercise 4 Entry Technique 3
On-Demand
This video demonstrates how to use the Wing Chun Entry Technique moving from cross to blind side with the opponent retaliating with a straight punch.

Block 5 Cross Arm Chi Sao - Exercise 1 Cross arm Chi Sao #1
On-Demand
This video demonstrates how to counter the lap sao punch using a huen sao to a side palm

Block 5 Cross Arm Chi Sao - Exercise 2 Cross Arm Chi Sao # 2
On-Demand
Level 5.0 Cross arm chi Sao Tech #2 Is follow top #1 adding a a jut sao and punch in response to your partners counter to your side palm.

Block 5 Cross Arm Chi Sao - Exercise 3 Cross Arm Chi Sao # 3
On-Demand
Level 5 Technique is the last in the three part series. Your partner counters your straight punch- you finish with a Tsuen sao punch to close out this techniqu

Block 5 Cross Arm Chi Sao - Exercise 4 Cross Hand Sao Free Flow Drill
On-Demand
Cross hand chi sao free flow drills are designed to enhance your sensitivity.

Block 5 Cross Arm Chi Sao - Exercise 5
On-Demand
Counter Lap Pak Sao Gan Sao staying on the inside

Block 5 Cross Arm Chi Sao - Exercise 6
On-Demand
Counter the Lap with Pak Sao Gan Sao this time moving outside.

Block 5 Cross Arm Chi Sao - Exercise 7
On-Demand
Counter to the Lap Sao with Opponent not letting go of the grab

Block 5 Cross Arm Chi Sao - Exercise 8 Lap Sao punch to the body
On-Demand

Block 5 Cross Arm Chi Sao - Exercise 9 Counter Lap with double Gan Sao
On-Demand
Counter Lap with double Gan Sao check and punch to finish.

Block 6 - Exercise 1 Parallel Hand Chi Sao # 1
On-Demand

Block 6 - Exercise 2 Parallel Hand Chi Sao # 2
On-Demand

Block 6 - Exercise 3 Parallel Hand Chi Sao # 3
On-Demand

Block 6 - Exercise 4 Parallel Hand Chi Sao # 4
On-Demand
Parallel hand chi sao technique introduces the Toii pak as a counter to the Lao-pak

Block 6 - Exercise 5 Parallel Hand Chi Sao # 5
On-Demand
Parallel hand chi sao # 5 introduce the huen sao as a counter to the lao - pak - Tsuen

Block 6 - Exercise 6 Paralle hand Chi Sao #6
On-Demand
Parallel hand Chi sao Technique deals with a opponent that tries to counter your Lao Sao Jut Sao by throwing a overhand right.

Block 6 - Exercise 7 Parallel Hand Chi Sao #7
On-Demand
This video demonstrates a second counter to the over hand right by using A Tsuen Sao instead of the Lap Sao.
Mark as complete

Block 6 - Exercise 8 Parallel Hand Chi Sao #8
On-Demand
Parallel hand inside Lap Sao from the lead following up with moving to the outside using Gan Sao

Block 6 - Exercise 9 Parallel Hand Chi Sao #9
On-Demand
Parallel Hand Chi Sao Counter to the inside Lap Sao by applying a Pak Sao Tsuen Sao to the incoming fist stay on the blind side.

Block 6 - Exercise 10 Parallel hand chi sao # 10
On-Demand
Parallel hand Chi Sao technique # 3 Lap Sao punch - off the backhand followPak Sao punch - opponent counters with Pak Sao - follow tsuen lap punch

Block 6 - Exercise 11 Parallel Hand Chi Sao # 11
On-Demand

Block 6 - Exercise 12 Parallel Hand Chi Sao # 12
On-Demand

Block 6 - Exercise 13 Parallel Hand Chi Sao # 13
On-Demand

Block 6 - Exercise 14 Parallel Hand Chi Sao # 14
On-Demand

Block 6 - Exercise 15 Parallel Hand Chi Sao # 15
On-Demand
a counter to techniques # 14 take a release step deflect with a Quan Sao- follow with Pak Sao punch
Block 7 Wooden Dummy Form and Application - Exercise 1 Wooden Dummy Set 1 with 2 man Set Application
On-Demand
Wooden Dummy Set 1 Demonstrated on the Dummy, in the air and with a partner

Block 7 Wooden Dummy Form and Application - Exercise 2
On-Demand
This video demonstratyes Set 2 of the Wooden Dummy form it is demonstrated on the Dummy, in the air and with a partner with combat applications.

Block 7 Wooden Dummy Form and Application - Exercise 3 Wooden Dummy Set 3 With Application
On-Demand
This video teaches you how to preform the third set on the Wooden Dummy. The set is demonstrated on the Dummy, in the air and with a partner

Block 7 Wooden Dummy Form and Application - Exercise 4 Wooden Dummy Set 4 Form
On-Demand

Block 7 Wooden Dummy Form and Application - Exercise 5 Wooden Dummy Set 4 Application
On-Demand

Block 7 Wooden Dummy Form and Application - Exercise 6 Wooden Dummy Set 5 Training
On-Demand

Block 7 Wooden Dummy Form and Application - Exercise 7 Wooden Dummy set 5 Application
On-Demand

Block 8 - Exercise 1 2 Hand Chi Sao 1
On-Demand

Block 8 - Exercise 2 2 Hand Chi Sao 2 Rolling
On-Demand

Block 8 - Exercise 3 8 Count Chi Sao
On-Demand
8 Count Chi Sao is a series of 8 movements used to train 2 hand chi sao. This help to develop sensitivity and forward pressure.

Block 8 - Exercise 4 Fuk Sao Lap Sao
On-Demand

Block 8 - Exercise 5
On-Demand
Technique # 2 is a counter to the Lap Sao using Bong Sao this technique can flow into the Bong Sao Lap Sao Drill

Block 8 - Exercise 6
On-Demand
Counter the Lap Sao using Pak Sao and Tan Sao

Block 8 - Exercise 7
On-Demand
Defend the Lap Sao with the double Gan Sao

Block 9 - Exercise 1
On-Demand
Defend front kick parallel - (side neutral) T step Pak Sao punch stay on the blind side.

Block 9 - Exercise 2
On-Demand
Defend round kick cross- (side neutral) T step double Pak Sao chain punch follow.

Block 9 - Exercise 3 Defend Side kick cross - (side neutral) T step Gan Sao front kick
On-Demand
Defend Side kick cross - (side neutral) T step Gan Sao front kick to the groin - follow Pak Sao Punch.
Mark as complete

Block 9 - Exercise 4
On-Demand
Counter against a jab cross combination parallel - Pak Sao Tsuen - lap sao stay on the blind side

Block 9 - Exercise 5
On-Demand
Counter against high round punch and low straight punch same arm Biu Sao- Jut Sao move to the blind side.

Block 9 - Exercise 6 Defend the straight jab with Pak Sao Tsuen Sao
On-Demand
Defend the straight jab with Pak Sao Tsuen Sao

Block 9 - Exercise 7 Defend High Round Kick Pak Sao Tan Sao
On-Demand
Defend High Round Kick Pak Sao Tan Sao

Block 9 - Exercise 8
On-Demand
Defend mid level side kick t step Gum Sao- follow low round kick to the lead leg

Block 9 - Exercise 9 Defend the high low round punch cross arm
On-Demand
Defend the high low round punch cross arm - Defend the eound punch cross arm with Pak Sao- defend the low punch parallel with Gan Sao - Finish work to the blind side.
6
Chapter 6 Wing Chun Level 6 Training

Block 1 Chum Kiu Form and Application - Exercise 1
On-Demand
This video demonstrates the form requirement for Level 6. Here we demonstrate the Chum Kiu form in its entirety.

Block 1 Chum Kiu Form and Application - Exercise 3 Reverse Lap Sao
On-Demand
This video demonstrates the applications to the reverse Lap Sao section in the Chum Kiu form

Block 1 Chum Kiu Form and Application - Exercise 2 T Step Biu Sao and Po Pai Section
On-Demand
This video demonstrates the application to the T Step Biu Sao and Po Pai Section of the Chum Kiu form

Block 2 Wooden Dummy - Exercise 1
On-Demand
This video demonstrates Set 6 on the Wooden Dummy

Block 2 Wooden Dummy - Exercise 2 Set 6 Wooden Dummy Form Application
On-Demand
This video demonstrates Set 6 Wooden Dummy form application

Block 3 Two hand Chi Sao - Exercise 1
On-Demand
Level 6 Two Hand Chi Sao technique #1 is defending a round punch attack

Block 3 Two hand Chi Sao - Exercise 2 Variation technique to defending the round punch attack
On-Demand
Level 6 Two Hand Chi Sao technique #2 is is a variation technique to defending the round punch attack

Block 3 Two hand Chi Sao - Exercise 3 defending the low round kick
On-Demand
Level 6 Two Hand Chi Sao technique #3 is defending the low round kick

Block 3 Two hand Chi Sao - Exercise 4
On-Demand
Level 6 Two hand Chi Sao technique #4 attacking with an elbow

Block 3 Two hand Chi Sao - Exercise 5 Defending the elbow attack
On-Demand
Level 6 Two Hand Chi Sao technique #5 is defending the elbow attack

Block 3 Two hand Chi Sao - Exercise 6 Steam Roller attack
On-Demand
Level 6 Two Hand Chi Sao technique #6 the Steam Roller attack

Block 3 Two hand Chi Sao - Exercise 7 Countering the Steam Roller Technique
On-Demand
Level 6 Two Hand Chi Sao Technique 7 is countering the Steam Roller Technique

Block 3 Two hand Chi Sao - Exercise 8 Tan Sao Chuen Sao Lap Sao
On-Demand
Tan Sao Chuen sao lap sao biu gee to the neck follow pak sao biu gee to the neck

Block 3 Two hand Chi Sao - Exercise 9
On-Demand
T step Bong Sao Lap Sao- front kick- arm break check lead arm follow 3 palm strikes to the face 2. T step bong sao lap sao- front kick- arm break check lead arm follow 3 palm strikes to the face

Block 3 Two hand Chi Sao - Exercise 10
On-Demand
T step Bong Sao- defend the round punch cross arm pak sao front kick- pak sao punch to the body- arm break- follow 3 palm strikes to the face

Block 3 Two hand Chi Sao - Exercise 11
On-Demand
Opponent applies a palm strike deflect palm strike Fuk Sao- Tan- reverse Lap Sao front kick- counter round punch cross arm with bong sao- move outside pak sao palm strike to the body

Block 3 Two hand Chi Sao - Exercise 12 Opponent gives heavy pressure with his Fuk Sao
On-Demand
Opponent gives heavy pressure with his Fuk sao- take a bake step to release the pressure and counter with a reverse lap sao follow front kick- opponent throws a second round punch on the same side counter with bong sao- move outside with lap sao follow palm strike
Mark as complete
Level

Block 3 Two hand Chi Sao - Exercise 13
On-Demand
Opponent steps out throw a high round punch - counter with T step Biu Sao front kick to the body low side kick to the knee- opponent follows low round punch to the body- defend low Bong sao to finish with double Po pai

Block 3 Two hand Chi Sao - Exercise 14
On-Demand
Demonstrates how to perform the Fuk Sao trap in Luk Sao

Block 3 Two hand Chi Sao - Exercise 15 Counter the trap
On-Demand
Counter the trap T step bong Sao turn into bong sao lap sao drill 2. Variation to counter technique 8 release step Quan Sao - into Bong sao Lap Sao Drill

Block 4 Wing Chun Techniques - Exercise 1
On-Demand
Technique 1 is Leg block from a side neutral- Defend straight or round kick with a stop kick can use stomp or side kick

Block 4 Wing Chun Techniques - Exercise 2
On-Demand
Technique 2 Defend mid level round kick to the open side double palm block - leg break finish chain punch
Block 4 Wing Chun Techniques - Exercise 3
On-Demand
Technique 3 defend against double round punch high low cross arm- step in with pak da- defend low round release step gan - punch move outside gan check and punch

Block 4 Wing Chun Techniques - Exercise 4
On-Demand
Technique 4 Defend double high round punch- 1/2 step into round attack with biu da - release step second high round counter with Tan Sao- move outside gan check and punch

Block 4 Wing Chun Techniques - Exercise 5
On-Demand
Technique 5 Defend against double straight punch high and low 1/2 side step bon sao - gum sao punch

Block 4 Wing Chun Techniques - Exercise 6 Defend short stick
On-Demand
echnique 6 Defend short stick cross arm - pak biu - stabilize the weapon then strip the weapon finish double strike to the face

Block 4 Wing Chun Techniques - Exercise 7 Defend the take down
On-Demand
Technique 7 Defend the take down - t step Gan - strike to the neck follow with arm or shoulder lock to drive them into the ground

Block 4 Wing Chun Techniques - Exercise 8
On-Demand
Defend a high round punch with Tan Sao-Follow Gan Sao - Pak Sao Punch- Armbreak

Block 4 Wing Chun Techniques - Exercise 9
On-Demand
Defend a low round punch parallel or cross from a front stance with a Gan Sao. Also dealing with an interruption.

Block 4 Wing Chun Techniques - Exercise 10 Defend the front kick with T step Pak Gan follow front kick to the body
On-Demand

Block 4 Wing Chun Techniques - Exercise 11
On-Demand
Defend against high round kick and punch combining chi sao.

Block 4 Wing Chun Techniques - Exercise 12
On-Demand
Defend against a short stick overhead strike.

Block 4 Wing Chun Techniques - Exercise 13
On-Demand
Defend against a back swing with a short stick.

Block 4 Wing Chun Techniques - Exercise 14 Defend round kick
On-Demand
Defend Round kick mid to high attack with Pak and Go BongS Wall cover down check the lead arm and punch

Block 4 Wing Chun Techniques - Exercise 15
On-Demand
Self defense against a side grab shoulder Biu sao side kick to the knee or midsection check and punch to follow

Block 4 Wing Chun Techniques - Exercise 16
On-Demand
Defend against high round punch step in lap sao punch stay on the inside also demo moving to the outside- follow explain against follow up from the opposite hand or front kick

Block 4 Wing Chun Techniques - Exercise 17
On-Demand
Defend against upward swing with a stick - Pak Gan- bring the hand over head down to arm break - finish sweep.

Block 4 Wing Chun Techniques - Exercise 18 Entry technique cross
On-Demand
Entry technique cross- Opponent steps back follow front kick and trap and punch the lead arm

Block 5 - Exercise 1
On-Demand
Technique 1 Pak Sao punch- opponent counter your punch with pak sao - follows round punch- counter round punch with go bong- opponent pulls down on go bong and follow side palm- counter his side palm with Bong Sao- Continue Lao Sao- Pak Sao Punch High.

Block 5 - Exercise 2
On-Demand
Technique 2 Same technique up to Bong Sao finish Lao Sao Pak Sao Punch to the body

Block 5 - Exercise 3
On-Demand
Same technique up to Bong Sao finish Lao Pak Sao - Chair Jeung to the jaw

Block 5 - Exercise 4
On-Demand
Same technique After Bong Sao follow Lap Sao Side Palm trap and punch to finish.

Block 5 - Exercise 5 Variation Pak sao punch- opponent counter your punch with pak sao
On-Demand
Variation Pak sao punch- opponent counter your punch with pak sao - follows round punch- counter round punch with go bong- opponent pulls down on go bong and follow side palm- counter his side palm with with Pak Sao- Chair Jeung to the jaw- opponent counter pal strike with Wu Sao - follow arm break to the outside

Block 5 - Exercise 6
On-Demand
Cross Arm Chi Sao 6 Lao jut tsuen - opponent steps back and throws punch with the lead arm to the body- counter with bon sao lap side palm pak ox jaw strike to the throat

Block 5 - Exercise 7
On-Demand
Variation to technique 6 counter with the lead arm Bong Sao

Block 5 - Exercise 8
On-Demand
Variation counter with Bong Sao move outside with Huen Sao

Block 5 - Exercise 9
On-Demand
Defend the low body shot with low Bong Sao to Lap Sao

Block 5 - Exercise 10 Defend the low straight punch
On-Demand
Defend the low straight punch with low Bong Sao off the inside arm

Block 6 - Exercise 1
On-Demand
Opponent moves to the inside with Huen Sao palm strike to the body- interrupt the palm with Bong Sao- follow Lap Sao side palm to the throat

Block 6 - Exercise 2
On-Demand
Opponent moves to the inside with huen sand palm strike to the body- interrupt the palm with Bong Sao Lap Sao strike to the body.

Block 6 - Exercise 3
On-Demand
Counter the Lap or the Dai Gan With Gan Sao Punch.

Block 6 - Exercise 4
On-Demand
Moving to the inside with Huen Sao Opponent Counter with a punch from the opposite hand. Defend using Huen Sao follow Pak Sao punch to the body.

Block 6 - Exercise 5 Defend the Huen Sao counter with Biu Sao front kick.
On-Demand
Defend the Huen Sao counter with Biu Sao front kick.

Block 7 - Exercise 1 Exchange Step Drill
On-Demand
The exchange step drill combined with the Pak Sao Tsuen Sao is a great drill to help with the process of interruption

Block 7 - Exercise 2
On-Demand
Kicking from the side neutral

Block 7 - Exercise 3
On-Demand
Five ways to train either the from kick- side kick or round kick using the rear leg

Block 7 - Exercise 4
On-Demand
Five ways to train either the from kick- side kick or round kick using the shuffle step

Block 7 - Exercise 5 Five ways to train either the from kick- side kick or round kick utilizing the T step
On-Demand
Five ways to train either the from kick- side kick or round kick utilizing the T step

Block 7 - Exercise 6 Five ways to train either the from kick- side kick or round kick utilizing the exchange step.
On-Demand
Five ways to train either the from kick- side kick or round kick utilizing the exchange step.
7
Chapter 7 Wing Chun Level 7 Training

Block 1 Biu Gee Form and Application - Exercise 1 Biu Gee Form Opening
On-Demand
Biu Gee Form Opening This also includes the Chi Gung set in the Biu Gee for,m

Block 1 Biu Gee Form and Application - Exercise 2
On-Demand
Biu Gee Elbow Set 1

Block 1 Biu Gee Form and Application - Exercise 3 Biu Gee Elbow set 1 application
On-Demand

Block 1 Biu Gee Form and Application - Exercise 4 Biu Gee Elbow Set 2
On-Demand

Block 1 Biu Gee Form and Application - Exercise 5 Biu Gee Elbows Sets 3&4
On-Demand

Block 1 Biu Gee Form and Application - Exercise 6 Biu Gee Elbows Sets 3&4 Application
On-Demand
Biu Gee Elbows Sets 3&4 Application

Block 1 Biu Gee Form and Application - Exercise 7 Biu Gee Form elbow sections linked together
On-Demand
Block 1 Biu Gee Form and Application - Exercise 8 Biu Gee Elbows Sets 3&4 Application
On-Demand
Biu Gee Elbows Sets 3&4 Application

Block 2 - Exercise 1 Wooden Dummy Set 7
On-Demand

Block 2 - Exercise 2 Wooden Dummy Set 7 Application
On-Demand
Wooden Dummy Set 7 Application

Block 3 - Exercise 1
On-Demand
Applying the 3 elbows from the first section of Biu Gee

Block 3 - Exercise 2
On-Demand
Applies chi sao to the second elbow section of the Biu Gee form using horizontal biu gee strikes

Block 3 - Exercise 3
On-Demand
Applies chi sao to the third elbow section of the Biu Gee form utilizing vertical biu gee strikes

Block 3 - Exercise 4 Applying the pushing outs drill from single hand Chi Sao.
On-Demand
Applying the pushing outs drill from single hand Chi Sao. This drill helps with defining energy direction and how to respond using the Luk Sao Rolling

Block 3 - Exercise 5
On-Demand
If your opponents Fuk Sao is floppy use Pak Sao on the inside.

Block 3 - Exercise 6
On-Demand
Your opponent’s Fuk Travels up your arm

Block 3 - Exercise 7 Opponent tries to over power you use lap sao from withe hand to identify the force and release
On-Demand
Opponent tries to over power you use lap sao from withe hand to identify the force and release

Block 3 - Exercise 8 Opponent tries to over power you apply a Gan Sao
On-Demand
Opponent tries to over power you use lap sao from withe hand to identify the force and release apply a Gan Sao

Block 4 - Exercise 1 defend a high round punch T step Jut sao front kick
On-Demand
defend a high round punch T step Jut sao front kick to the body and follow up interruptions

Block 4 - Exercise 2
On-Demand
Defend low round punch t step gum sao low side kick with interruptions

Block 4 - Exercise 3
On-Demand
Defend front kick and punch parallel T Step Gan Sao Pak Sao punch with follow up interruptions.

Block 4 - Exercise 4
On-Demand
Defend round kick to the body and punch release step double Gum Sao leg break lap Sao punch

Block 4 - Exercise 5 Defend the jab cross applying the Huen Sao
On-Demand
Defend the jab cross applying the Huen Sao from set 5 on the Wooden Dummy and the Bong Sao Lap Sao

Block 5 - Exercise 1
On-Demand
Wooden Dummy Kicking First Action
Block 5 - Exercise 2
On-Demand
Wooden Dummy Kicking First Action Application

Block 5 - Exercise 3 Wooden Dummy Kicking First Action Application 2
On-Demand
Wooden Dummy Kicking First Action Application 2. - Application Parallel defend straight punch parallel with quan sao - follow - side kick to the front knee on the outside

Block 5 - Exercise 4 Wooden Dummy Kicking First Action Application 3
On-Demand
Wooden Dummy Kicking First Action Application 3. - Application defend double straight punch parallel with pak - second - punch from the short arm release cover with quan - follow front kick to - the inside of the front kick on the opposite side

Block 5 - Exercise 5 Wooden Dummy Kicking Second Action
On-Demand
Wooden Dummy Kicking Second Action. * 3 Motion in 1 - Drill: Gum - tan - bon (cross arm) move outside - Tan mid palm stomp kick - alternate sides.

Block 5 - Exercise 6 Wooden Dummy Kicking Second ActionApplication 1
On-Demand
Application defend the front kick with defend parallel straight punch with - tan - defend cross arm round punch with bon- move out side with tan - sao-palm strike the body and kick the front leg. The 3 motions are - punching, stopping and kicking
Mark as complete

Block 5 - Exercise 7 Wooden Dummy Kicking Second Action Application 2
On-Demand
Wooden Dummy Second Action Application 2 - parallel pak sao the straight punch defend the cross with tan - sao palm strike the body and kick the front leg or the rear leg.

Block 5 - Exercise 8 Wooden Dummy Kicking Second Action Application 3
On-Demand
Wooden Dummy Second Action Application 3 defend the straight punch cross arm with Pak Ta

Block 6 - Exercise 1 Front Kick Low Side Kick
On-Demand

Block 6 - Exercise 2 Mid and Low Side Kick Combination
On-Demand

Block 6 - Exercise 3 Mid Level Side Kick - Low Round Kick Combination
On-Demand
This video demonstrates the mid side kick to low round kick combination.

Block 7 - Exercise 1 Daan Chi Sao Leaving From Underneath
On-Demand

Block 7 - Exercise 2 Daan Chi Sao Leaving from on top
On-Demand
This Video demonstrates how to leave from on top during the Daan Chin Sao Drill.
8
Chapter 8 Wing Chun Level 8 Training

Block 1 - Exercise 1
On-Demand
This video demonstrates how to do set 8 on the wooden dummy

Block 1 - Exercise 2 Wooden Dummy Set 8 Applications
On-Demand
This video demonstrate the combat application of set 8

Block 1 - Exercise 3 Wooden Dummy Third Kicking Action
On-Demand

Block 1 - Exercise 4 Wooden Dummy Third Action Application 1
On-Demand

Block 1 - Exercise 5 Wooden Dummy Third Action Application 2
On-Demand

Block 1 - Exercise 6 Wooden Dummy Kicking The Fourth Action
On-Demand

Block 1 - Exercise 7 Wooden Dummy Kicking Fourth Action Application 1
On-Demand

Block 1 - Exercise 8 Wooden Dummy Kicking Fourth Action Application 2
On-Demand
Defend the double round punch jut- biu - defend the uppercut with gum sao-defend the straight punch cross arm release biu front kick

Block 2 - Exercise 1 Biu Gee Section 5 Gui Ma
On-Demand

Block 2 - Exercise 2 Biu Gee Section 5 Gui Ma Application 1
On-Demand
Block 2 - Exercise 3 Biu Gee Section 5 Gui Ma Application 2
On-Demand

Block 2 - Exercise 4 Biu Gee Section 6 Gan sao
On-Demand

Block 2 - Exercise 5 Biu Gee Section 6 Gan Sao Application
On-Demand
This Video Demonstrates the first application to the Gan Sao Section of the Biu Gee Form

Block 2 - Exercise 6 Biu Gee Form Quan Sao Application 1
On-Demand

Block 2 - Exercise 7 Biu Gee Form Quan Sao Application 2
On-Demand
This video demonstrates the second application of the Quan Sao Section of the Biu Gee form

Block 2 - Exercise 8
On-Demand
This video links the entire Biu Gee form together

Block 3 - Exercise 1
On-Demand
Defend the palm strike with jut sao defend the rush with t step Gan Sao to arm bar squat draw him down check and punch to finish

Block 3 - Exercise 2 Defend the three round punches
On-Demand
Defend the three round punches step back three biu to jut sao palm strike gan to the outside to finish Wooden Dummy Kicking

Block 3 - Exercise 3 Defend the round punch step back double Gan
On-Demand
Defend the round punch step back double Gan front kick to the body side kick to the knee huen sao to the outside pak sao palm to finish
Mark as complete
2

Block 3 - Exercise 4 Defend the round punch release step Quan Sao
On-Demand
Defend the round punch release step Quan Sao check the front leg front kick to the body move to the outside with Po Pa Jeungi

Block 4 - Exercise 1 Enter on an opponent parallel side
On-Demand

Block 4 - Exercise 2
On-Demand
Entry technique 2 parallel staying on the inside

Block 4 - Exercise 3 Entering on fighter weighted on his back foot
On-Demand

Block 4 - Exercise 4 Cross legged entry
On-Demand

Block 4 - Exercise 5 Enter on a fighter weighted on their front foot
On-Demand

Block 4 - Exercise 6 Enter on a fighter switching stances.
On-Demand

Block 4 - Exercise 7 Entering on a round punch
On-Demand

Block 4 - Exercise 8 Entry on an opponent that throws a spinning backlist.
On-Demand
Entry on an opponent that throws a spinning backlist.

Block 5 - Exercise 1 Pak Sao Lap Sao Si 18 & Th 23
On-Demand

Block 5 - Exercise 2 Counter Pak Sao Double Gan Liv 14
On-Demand

Block 5 - Exercise 3 Pak Lap Si 16
On-Demand

Block 5 - Exercise 4 Counter Lap Double Gan Th 23
On-Demand

Block 5 - Exercise 5 Lap Sao Pak Sao Th 23 & Si 16
On-Demand

Block 5 - Exercise 6 Counter Lap Pak Sao Gan Cv22
On-Demand
Counter Lap Pak Sao Gan Cv22

Block 5 - Exercise 7 Counter Pak Gan inside Si 16
On-Demand
Counter Pak Gan inside Si 16

Block 6 - Exercise 1 2 Hand Pressure Point Chi Sao 1 Fuk Sao Lap Sao Li 17 & Th 23 Mark as complete 2
On-Demand
2 Hand Pressure Point Chi Sao 1 Fuk Sao Lap Sao Li 17 & Th 23
Mark as complete
2

Block 6 - Exercise 2 2 Hand Pressure Point Chi Sao 2 Counter Fuk Sao Lap Sao Si 16 & Si
On-Demand

Block 6 - Exercise 3
On-Demand
2 Hand Pressure Point Chi Sao 3 Counter Variation # 2 Pak Sao Gan Sao Si 16 & Si 18
Block 6 - Exercise 4
On-Demand
2 Hand Pressure Point Chi Sao 4 Third Variation T step Bong Sao CV 22

Block 6 - Exercise 5
On-Demand
2 Hand Pressure Point Chi Sao 5 2 Hand Pressure Point Chi Sao 5 Fuk _ Gan Sao Si 18 & Si 16

Block 6 - Exercise 6
On-Demand
2 Hand Pressure Point Chi Sao 5 2 Hand Pressure Point Chi Sao 6 Palm strike Lap Sao Th 23

Block 6 - Exercise 7 2 Hand Pressure Point Chi Sao 5 2 Hand Pressure Point Chi Sao 7 Counter Palm strike Si 16
On-Demand
2 Hand Pressure Point Chi Sao 5 2 Hand Pressure Point Chi Sao 7 Counter Palm strike Si 16

Block 7 - Exercise 1 Defend a Spinning hook kick with Pak Sao Biu Sao
On-Demand

Block 7 - Exercise 2 Defend a low sweep with a Knee Drop
On-Demand
Defend a low sweep with a Knee Drop

Block 8 - Exercise 1 Defend the Knife Thrust with Pak Sao and Chin Na
On-Demand
Defend the Knife Thrust with Pak Sao and Chin Na

Block 8 - Exercise 2 Self Defense against an upward thrust with a knife with double Pak Sao
On-Demand

Block 8 - Exercise 3 Self Defense against a backhand slash with double Lap Sao finish with Chin Na
On-Demand
Self Defense against a backhand slash with double Lap Sao finish with Chin Na
9
Chapter 9 Wing Chun Level 9 & 10 Training

Block 1 - Exercise 1 Self Defense Long Pole
On-Demand

Block 1 - Exercise 2 Self Defense for 2 hand Choke Attacking pressure points
On-Demand
Self Defense for 2 hand Choke Attacking pressure points

Block 1 - Exercise 3 Self Defense Shoulder Grab from behind
On-Demand
Self Defense Shoulder Grab from behind Attacking pressure points.

Block 2 - Exercise 1 Cross Arm Pressure Point Chi Sao
On-Demand
Cross Arm Pressure Point Chi Sao

Block 3 - Exercise 1 Lim sao Front Kick
On-Demand

Block 3 - Exercise 2 Counter the front kick
On-Demand

Block 3 - Exercise 3 Counter the Front Kick Variation
On-Demand
Counter the Front Kick Variation

Block 4 - Exercise 1 Front Leg Entry Technique
On-Demand
Front Leg Entry Technique

Block 5 - Exercise 1 Wooden Dummy Set 9
On-Demand

Block 5 - Exercise 2
On-Demand
This video demonstrates the 2 man combat application to Wooden Dummy Set 9

Block 5 - Exercise 3 Wooden Dummy Set 10
On-Demand

Block 5 - Exercise 4
On-Demand
Wooden Dummy Set 10 Application

Block 5 - Exercise 5 Wooden Dummy Set 11
On-Demand

Block 5 - Exercise 6 Wooden Dummy Set 11 Application
On-Demand
Wooden Dummy Set 11 Application
Block 5 - Exercise 7
On-Demand
Wooden Dummy Set 12

Block 5 - Exercise 8 Wooden Dummy Set 12 Application
On-Demand

Block 5 - Exercise 9 Wooden Dummy Set 13
On-Demand

Block 5 - Exercise 10 Wooden Dummy Set 13 Application 1
On-Demand

Block 5 - Exercise 11 Wooden Dummy Set 13 Application 2
On-Demand
Wooden Dummy Set 13 Application 2
10
Wing Chun Empty Hand Forms
Block 1 - Exercise 1
On-Demand
Block 2 - Exercise 1
On-Demand
This is the second form of Traditional Wing Chun. This form was developed right Grandmaster Cheung. It intrudes different punching techniques and a basic throw
Block 3 - Exercise 1
On-Demand
This video takes you through the level 5.0 Chum Kiu form requirements
Block 4 - Exercise 1
On-Demand
This video links the entire Biu Gee form together
11
Wing Chun Sparring Drills

Block 1 - Exercise 1
On-Demand
Defend jab Hook Same hand Pak Biu- Defend low round with low bong move to Pak Sao punch - follow side palm to Choke

Block 1 - Lesson 2
On-Demand
This video demonstrates how to counter the jab cross with a huen sao pak sao

Block 1 -
On-Demand
Defending the jab hook with Pak Sao and Go Bog Sao

Block 1 -
On-Demand
This video takes you through various ways of dealing with straight punches parallel and cross high and low
Block 1 -
On-Demand
This video demonstrates using basic blocks to defend against a 4 piece attack
Block 1 -
On-Demand
This video goes through various sparring applications using Tan Sao
Block 1 -
On-Demand
Chum Kiu opening applications

Block 1 -
On-Demand
This Video demonstrates Demonstrates how to use the reverse T step for round punch defense. It also demonstrates the standing section of the Biu Gee Gui Ma application.
Block 1 -
On-Demand
This video demonstrates a 4 part shadow boxing routine with applications as well as a two person training set. These techniques will greatly help with your Wing Chun Training
Block 1 -
On-Demand
This video teaches an application to defending the Cross uppercut combination
12
Wing Chun Stick Fighting

Block 1 - Exercise 1
On-Demand
1. Defend back hand strike with pak defend round strike with double gan- move outside with Pak - finish back hand strike to the wrist and forehand strike to the face.

Block 1 - Exercise 2
On-Demand
2. Defend back hand with a pak - defend round strike with Quan- move to the out side with Tan - follow back hand strike to the elbow finish -fore hand strike with the opposite hand to the face.

Block 1 - Exercise 3
On-Demand
3. Defend back hand with pak and strike hand simultaneous defend round with quan sao and move outside using lap from underneath - finish strike to the elbow - then strike to the face
13
Wing Chun Chi Na Chi Sao and Throws

Block 1 - Exercise 1
On-Demand
Combining Wing Chun With Chin Na and Chi sao Defending a straight punch move to a lock and a take down

Block 1 - Exercise 2
On-Demand
This Video uses Wing Chun moving from pre contact through Chi Sao defending a round punch to a lock and moving to a takedown

Block 1 - Exercise 3
On-Demand
This video demonstrates moving from Pak sao to an arm bar to take down this video is demonstrated from pre contact and chi sao
Block 1 - Exercise 4
On-Demand
This video demonstrates countering a round punch moving to a arm lock then a takedown. This movement is demonstrated from pre contact and 2 arm chi sao

Block 1 - Exercise 5
On-Demand
This video demonstrates countering a straight punch then moving to a choke then a takedown. These techniques are demonstrated from precontact and 2 hand chi sao
14
Random Parallel Hand Chi Sao Techniques

Block 1 - Exercise 1
On-Demand
A 3 part parallel hand using Pak Sao to attack your opponent, Countering Techniques and follow ups
15
Random Cross Arm Chi Sao Techniques

Block 1 - Exercise 1
On-Demand
This is a 4 Part Routine Utilizing Cross Arm Chi Sao. Here we will start with attacking with pak sao punch and following through with a 4 part routine

Block 1 - Lesson 2
On-Demand
Cross Arm Chi Sao Pak Sao Drills and Follow Ups

Block 1 - Lesson 3
On-Demand
This Video Covers Lap Sao Drills and Counters

Block 1 -
On-Demand
Cross Arm Chi Sao Pak Sao punch Lap Sao Punch

Block 1 -
On-Demand
Cross Arm Chi Sao Defensive counter 1 inside

Block 1 -
On-Demand
Cross Arm Chi Sao Moving Inside Trap Lao Sao Pak

Block 1 -
On-Demand
Cross Arm Chi Sao Defensive counter variation outside.

Block 1 -
On-Demand
Cross Arm Chi Sao Counter Lap Sao

Block 1 -
On-Demand
Cross Arm Chi Sao Offensive and Defensive Counters.

Block 1 -
On-Demand
This video is a free flow drill for cross arm chi sao. Moving from Pak Sao Punch to defending the round punch.

Block 1 -
On-Demand
Reverse Pak Sao Drills
Block 1 -
On-Demand
Reverse Pak sao Drills Continued to random Drills
Block 1 -
On-Demand
This video takes you through a cross arm Chi Sao routine staring from Lap Sao moving into a back and forth training routine.
Block 1 -
On-Demand
This video demonstrates primary vs secondary movements in Cross Arm Chi Sao
16
Random 2 Arm Chi Sao Training Techniques

Block 1 - Exercise 1
On-Demand
How to deal with an Opponent Using Excessive Force

Block 1 - Exercise 2
On-Demand
This video demonstrates several ways to employ your close quarter kicking in 2 Arm Chi sao

Block 1 - Exercise 3
On-Demand
Tan Sao Lap Sao Flow Exercise from 2 Arm Chi Sao

Block 1 - Lesson 4
On-Demand
This Video demonstrates Pak Sao Punch from 2 Hand Chi Sao and counters into free flow drills

Block 1 - Lesson 5
On-Demand

Block 1 - Lesson 6
On-Demand
This video demonstrates how to take a trap from the Gan Sao in two hand chi sao, how to counter it and take another trap

Block 1 - Lesson 7
On-Demand
How to apply pak sao punch and a counter from 2 hand Chi Sao

Block 1 -
On-Demand
This video goes through three trapping Chi Sao Techniques and there counters. Also following up into free flow drills
17
Chapter 17 Wing Chun Kicking

Block 1 Basics - Exercise 1
On-Demand
These are specific drills for Wing Chun to help develop your kicking skills

Block 1 Basics - Exercise 2
On-Demand
This is an 8 part kicking drill used to increase your flexibility and enhance your kicking skills

Block 1 Basics - Exercise 3
On-Demand
These are basic partner drills to begin using multiple kicks

Block 1 Basics - Exercise 4
On-Demand
Wing Chun Kicking defending a Round Kick With Bong Gerk

Block 1 Basics - Exercise 5
On-Demand
Wing Chun Kicking How to defend a front Kick with a Stop Kick

Block 1 Basics - Exercise 6
On-Demand
From Chi Sao. How to defend a front kick with Bong gerk

Block 1 Basics - Exercise 7
On-Demand
Wing Chun Kicking Training Knee Drills

Block 2 2 Arm Chi sao - Exercise 1
On-Demand
This video about how to perform a jut sao front kick from 2 hand chi sao

Block 2 2 Arm Chi sao - Exercise 2
On-Demand
This Video is about countering the front kick while in 2 arm chi sao

Block 2 2 Arm Chi sao - Exercise 3
On-Demand
Countering The Stomp Kick from 2 Arm Chi sao

Block 2 2 Arm Chi sao - Exercise 4
On-Demand
Countering The Knee Strike from 2 Arm Chi sao

Block 2 2 Arm Chi sao - Exercise 5
On-Demand
How to Counter the Gum Gerk from 2 Arm Chi Sao

Pre Contact Tecniques - Exercise 1
On-Demand
How To Counter a Low Round Kick using an Exchange Step

Pre Contact Tecniques - Exercise 2
On-Demand
How to perform a Gum Gerk to defend a Round Kick in Wing Chun

Pre Contact Tecniques - Exercise 3
On-Demand
How To Counter a Low Round Kick using an Exchange Step and front kick in Wing Chun

Pre Contact Tecniques - Exercise 4
On-Demand
How to defend the Low Round Kick using a Combination Bong Gerk and Gum Gerk

Pre Contact Tecniques - Exercise 5
On-Demand
How To Counter the Low Round Kick followed by a Spin Kick using the exchange step and Bong Gerk

Pre Contact Tecniques - Exercise 6
On-Demand
How to use a Huen To defend a front kick Using a Huen Gerk and Drag Technique in Wing Chun
18
Preliminary Exercises

Block 1 - Exercise 1
On-Demand
Preliminary Exercise #1 How to perform the Pak Sao Tan Sao Drill

Block 1 - Exercise 2
On-Demand
Preliminary Exercises #2 How to perform Bong Sao Drill

Block 1 - Exercise 3
On-Demand
Preliminary Exercises # 3 How to perform Quan Sao Drill

Block 1 - Exercise 4
On-Demand
Preliminary Exercise #4 How to perform Huen Sao Drill

Block 1 - Exercise 5
On-Demand
Preliminary Exercise #5 How to perform Pak sao - Pak sao Biu Sao Drill.mp4

Block 1 - Exercise 6
On-Demand
Preliminary Exercise # 6 How to perform Pak Sao- Biu Sao Drill Cross Arm.

Block 1 - Exercise 7
On-Demand
Preliminary Exercise # 7 How to Perform The Bong Sao To Arm Break.
Block 1 - Exercise 8
On-Demand
Preliminary Exercise # 8 How To Perform The Double Gan Sao Drill.

Block 1 - Exercise 9
On-Demand
Preliminary Exercise # 4 How to perform Random Drills.

1000 Punch Warm Up Routine 1 - Lesson 11
On-Demand

1000 Punch Warm Up Routine 1 - Lesson 2
On-Demand
Pak Sao Tsuen Sao Lap Sao 10 chain Punch follow 10 sets

1000 Punch Warm Up Routine 1 - Lesson 3
On-Demand
Exchange Step Pak Sao Tsuen Sao Lap Sao 10 chain Punch follow 10 sets

1000 Punch Warm Up Routine 1 - Lesson 4
On-Demand
Bong Sao Lap Sao Punch 10 chain Punch follow 10 sets

1000 Punch Warm Up Routine 1 - Lesson 5
On-Demand
Bong Sao Pak Sao Tsuen Sao Lap Sao 10 chain Punch follow 10 se

1000 Punch Warm Up Routine 1 - Lesson 6
On-Demand
Bong Sao Pak Sao punch 10 chain Punch follow 10 set

1000 Punch Warm Up Routine 1 - Lesson 7
On-Demand
Exchange Step Bong Sao Lap Sao Punch. Bong sao hand takes the lap

1000 Punch Warm Up Routine 1 - Lesson 8
On-Demand

1000 Punch Warm Up Routine 1 - Lesson 9
On-Demand
1000 Punch Warm Up Routine 1 - Lesson 10
On-Demand
1000 Punch Warm Up Routine 1 - Lesson 11
On-Demand
Final thoughts on the routine
19
Chapter 19 Wing Chun-Grappling

Module 1 Break falls - Lesson 1
On-Demand
This Video Demonstrates how to do a rear break fall
Module 1 Break falls - Lesson 2
On-Demand
This video demonstrates how to do a right side break fall
Module 1 Break falls - Lesson 3
On-Demand
This video demonstrates how to do a left side break fall
Module 2 Arm Drags - Lesson 1
On-Demand
Module 2 Arm Drags - Lesson 2
On-Demand
Defend the round Punch with Biu Sao move to an arm drag takedown
Module 3 Neck Throw - Lesson 1
On-Demand
Basic Neck Throw
Module 3 Neck Throw - Lesson 2
On-Demand
This video demonstrates a simple double leg takedown
Module 3 Neck Throw - Lesson 3
On-Demand
This video demonstrates how to do an outside leg circle throw
Module 3 Neck Throw - Lesson 4
On-Demand
This video teaches you how to do a White Crane Hip Bump Throw
Module 3 Neck Throw - Lesson 5
On-Demand
This video teaches you how to do a thigh tap throw
Module 3 Neck Throw - Lesson 6
On-Demand
Thi Video demonstrates some of the ways on how to counter a leg throw
20
Advanced Sil Lim Tao 2
Module 1 - Lesson 1
On-Demand
Advanced Sil Lim Tao 2 Opening Through Tan Sao Section
Module 1 - Lesson 2
On-Demand
Advanced Sil Lim Tao 2 Gum Section Sao
Module 1 - Lesson 3
On-Demand
Advanced Sil Lim Tao 2 Wang Pak Section
Module 1 - Lesson 4
On-Demand
Advanced Sil Lim Tao 2 Biu Sao Section
Module 1 - Lesson 5
On-Demand
Advanced Sil Lim Tao 2 Tan Sao Jut Sao Section
Module 1 - Lesson 6
On-Demand
Advanced Sil Lim Tao 2 Tan Sao Gan Sao Section
Module 1 - Lesson 7
On-Demand
Advanced Sil Lim Tao 2 Bong Sao Section
Module 1 - Lesson 8
On-Demand
Advanced Sil Lim Tao 2 Closing
Module 1 - Lesson 9
On-Demand
Advanced Sil Lim Tao 2 Complete
21
Self Defense
Module 1 - Defend The Grab
On-Demand
Defending against a single arm grab with Pak Sao Tsuen sao

Module 1 - Lesson 2
On-Demand
This video adds the low front kick into the Pak Sao Tsuen Sao for self defenses against the grab

Module 1 - Lesson 3
On-Demand
This video demonstrates how to defend against a high round grab with Biu Saoi

Module 1 - Lesson 4
On-Demand
This video demonstrates a method of defending the arm grab using the Lao Sao combined with the Pak Sao
22
Random Training Drills

Bong Sao Lap Sao Drills - Lesson 1
On-Demand

Bong Sao Lap Sao Drills - Lesson 2
On-Demand

Bong Sao Lap Sao Drills - Lesson 3
On-Demand
Bong Sao Lap Sao Drills - Lesson 4
On-Demand

Bong Sao Lap Sao Drills - Lesson 5
On-Demand

Bong Sao Lap Sao Drills - Lesson 6
On-Demand

Bong Sao Lap Sao Drills - Biu Sao Tutorial Part 1
On-Demand
This Video is part one of a Tutorial On biu Sao for structure function and application

Bong Sao Lap Sao Drills - Biu Sao Tutorial Part 2
On-Demand
Bong Sao Lap Sao Drills -
On-Demand
This Video cover a basic sparring combination using techniques from the Sil Lim Tao
Meet Your Coach

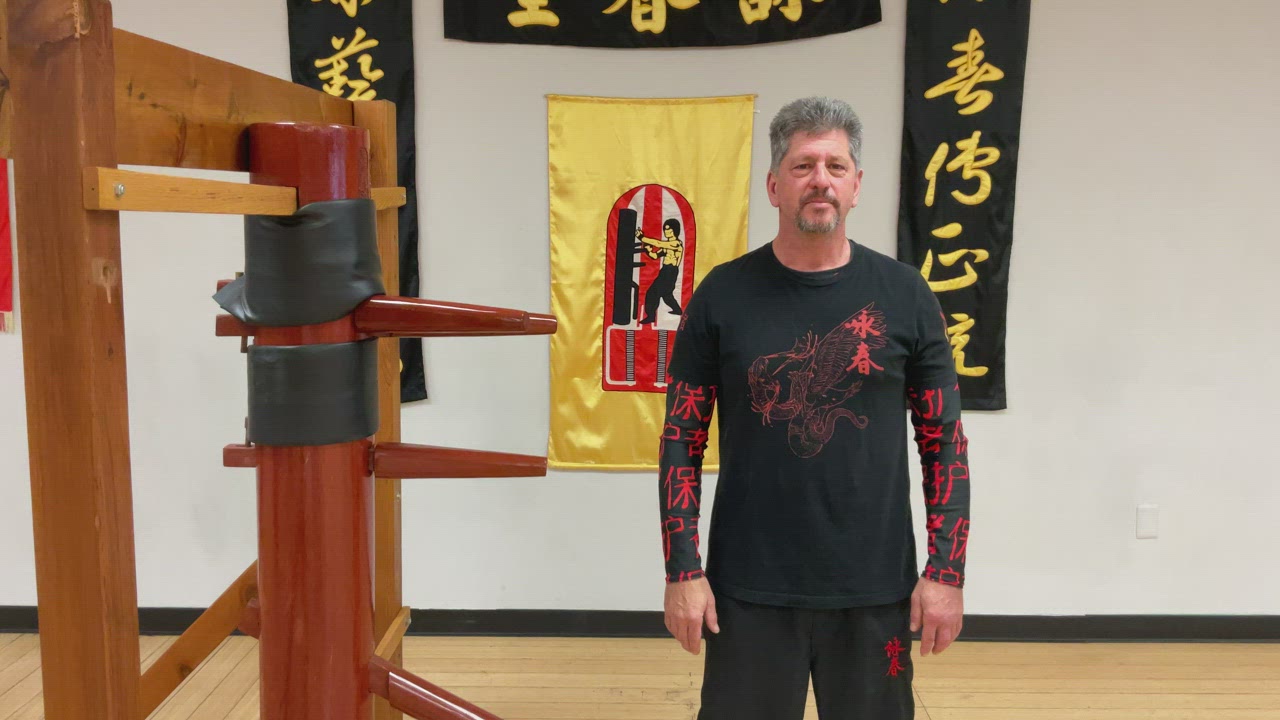
Keith Mazza
“Building one of the largest online video libraries for learning Traditional Martial arts.”
“If you know the Way broadly, you will see it in everything.”
Miyamoto Musashi
Learn the internal and external aspects of:
*Traditional Wing Chun
*Tai Chi Chuan
*Hsing I (Xing Yi)
*Baguazhang
*Kali
*Qigong
and more…
The videos are easy to follow no matter what level your at and are great for:
-Self defense
- Practical effective skillset development
-Application for real world combat
-meditative practices
-strength training
-wholistic approach to training
Learn how to use the art and why it is so effective.
Keith Mazza is a long time combative arts teacher who is known in the martial arts community as as a teacher of teachers. He was hand-picked by Grandmaster Cheung to train and serve as the North American Liaison for the World Wing Chun Kung Fu Association.
Master Mazza specializes in Traditional Wing Chun and also teaches Tai Chi, Bagua, Xing Yi, Qigong and Kali.
He has earned the title of Master under Grandmaster William Cheung through dedicated practice and pressure testing his skills as he and his mentor traveled around the world. They proved the efficiency of the art by engaging in friendly exchanges, sanctioned fights, unsanctioned fights and challenge matches.
Master Mazza has also successfully ran his own martial arts academy since 1990 and is a certified Combatives and Defensive Tactics Instructor through the Institute of Protection Specialists and Security Contractors (IPSSC). He has been responsible for training and implementing Executive Protection teams both inside and outside the United States.
Be patient and enjoy your practice.
Who's This For
This unique program is one of the only you'll find anywhere online that covers so many aspects of the art while at the same time giving you a road map all the way to the end of mastery.
This program is designed to give you an introduction to one of the most popular kung fu styles in the world, Wing Chun.
This program is both in-depth and simple to practice.
Master Keith Mazza has been practicing for over 50 years and has mastered the art of Traditional Wing Chun under the strict guidance of Grandmaster William Cheung.
You'll have access to a supportive community and learn the internal, external and weapon forms of this beautiful art.
Features
Chat Your Coach
Web + Mobile Apps
Leave Notes
Integrate Wearables
Get Expert Coaching