Go back
$1
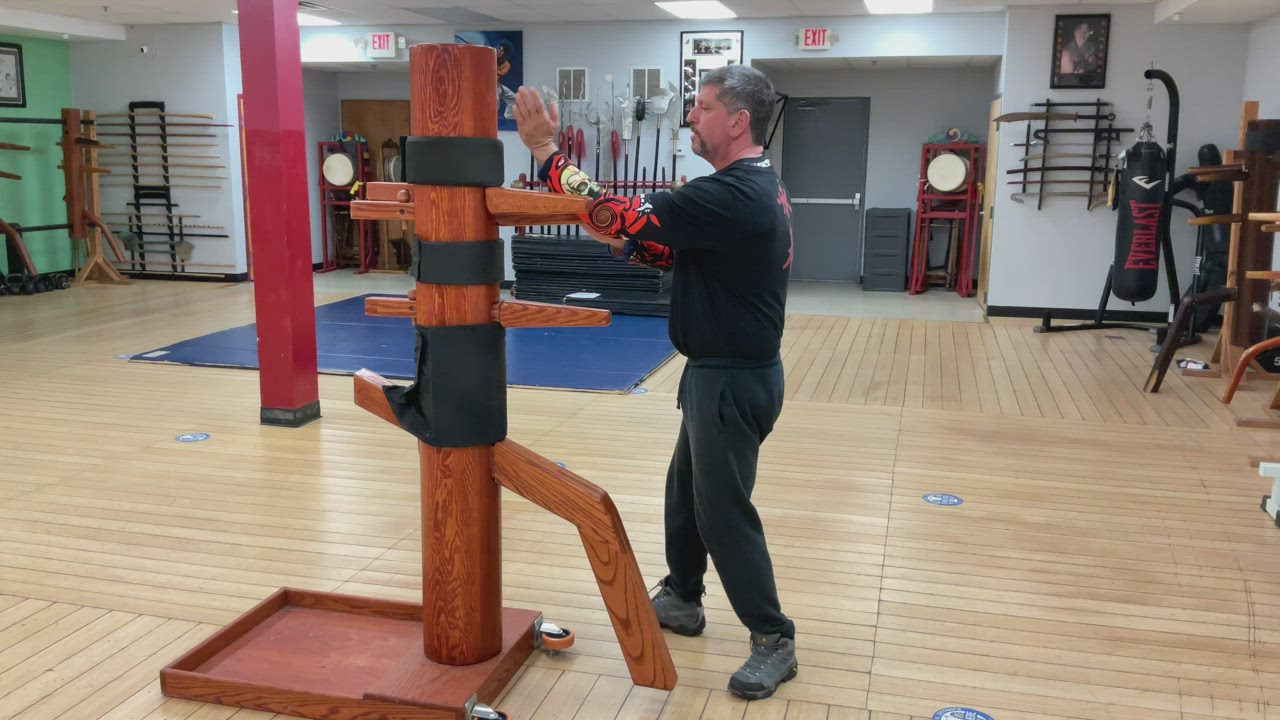
Wooden Dummy Training
The Wing Chun wooden dummy is one of the quintessential aspects of good Wing Chun training. Although you can practice Wing Chun without a dummy, the Mook Yan Jong—wooden dummy—is the ultimate solo tra... Read More

Wooden Dummy Training
118 On-Demand Videos
Wooden Dummy Training
On-Demand
1
Chapter 1 Wooden Dummy Training Drills

Block 1 - Exercise 1 Pak Sao Lap Sao on the Wooden Dummy and the combat application to it.
On-Demand
This Video Demonstrates how too train the Pak Sao Lap Sao on the Wooden Dummy and the combat application to it.

Block 1 - Exercise 2 Pak Sao Lap Sao variation
On-Demand
Dummy Drill 2 takes you through a variation on how to apply the Pak Sao Lap Sao both on the dummy and in combat Mark as complete
Block 1 - Exercise 3 Bong Sao for both attacking and defending
On-Demand
Dummy Drill 3 on the wooden dummy introduces the Bong Sao for both attacking and defending following up with the Lap Sao side palm - Pak Sao high palm to Gan Sao mid level palm strike. This application is demonstrated both on the dummy and with a partner

Block 1 - Exercise 4 Bong Sao Lap Sao to Gan Sao- Quan Sao-finishing with the Tan Sao mid level palm
On-Demand
Exercise 4 Bong Sao Lap Sao to Gan Sao- Quan Sao-finishing with the Tan Sao mid level palm

Block 1 - Exercise 5 Bong Sao-Lap Sao- Gan Sao- Jut Sao-Pak Sao- Tsuen Sao- Lap
On-Demand
Exercise 5 Bong Sao-Lap Sao- Gan Sao- Jut Sao-Pak Sao- Tsuen Sao- Lap

Block 1 - Exercise 6 Bong Sao Lap Sao side palm and introduces us to the Lan Sao - Gan Sao transition.
On-Demand
Exercise 6 Bong Sao Lap Sao side palm and introduces us to the Lan Sao - Gan Sao transition.

Block 1 - Exercise 7 Bong Sao Lap Sao Side Palm- Biu Sao Palm Stike- Jut Sao Tsuen Sao mid level palm- Pak sao high palm
On-Demand
Exercise 7 Bong Sao Lap Sao Side Palm- Biu Sao Palm Stike- Jut Sao Tsuen Sao mid level palm- Pak sao high palm

Block 1 - Exercise 8 Bong Sao Lap Sao high side palm- Dahn Sao high palm- Gan Sao mid level palm
On-Demand
Exercise 8 Bong Sao Lap Sao high side palm- Dahn Sao high palm- Gan Sao mid level palm

Block 1 - Exercise 9 Cross arm technique Bong Sao front kick. Bong Sao Lap Sao mid level palm- Pak Sao high palm
On-Demand
Dummy Drill 9 Cross arm technique Bong Sao front kick. Bong Sao Lap Sao mid level palm- Pak Sao high palm

Block 1 - Exercise 10 Cross arm Bon Sao, step out Biu Sao – front kick
On-Demand
Drill #10 Cross arm Bon Sao, step out Biu Sao – front kick (same arm). Bon Sao to other side, release to outside. Double palm (Po Pai).

Block 1 - Exercise 11 Cross arm Bon Sao. Tan Sao – high palm strike (
On-Demand
Dummy Drill #11 Cross arm Bon Sao. Tan Sao – high palm strike (tan inside other arm). Garn Sao – low palm ( to outside of original side)

Block 1 - Exercise 12 Dummy Drill #12 Pak Sao front kick rear sweep same Leg
On-Demand
Dummy Drill # 12 Pak Sao front kick rear sweep same Leg

Block 1 - Exercise 13 Dummy Drill #13
On-Demand
Dummy Drill #13 Bong Sao Lap Sao Pak palm - front sweep

Block 1 - Exercise 14 Kick Defense
On-Demand
Dummy Drill #14 kick defense Biu cover the low arm with lead leg - jut tsuen side palm pak punch to finish

Block 1 - Exercise 15 Biu Sao deflect pak sao punch
On-Demand
Dummy Drill # 15 Biu Sao deflect pak sao punch

Block 1 - Exercise 16 Dummy Drill # 16 Triple Pak Sao Set
On-Demand
Dummy Drill # 16 Triple Pak Sao Set

Block 1 - Exercise 17 Dummy Drill # 17 Gan Huen arm break
On-Demand
Dummy Drill # 17 Gan Huen arm break

Block 1 - Exercise 18 Dummy Drills #18 Set 1 first 3 moves
On-Demand
Dummy Drills #18 Set 1 first 3 moves

Block 1 - Exercise 19
On-Demand
Dummy Drill 19
* Biu-Biu-double gan-Huen-Biu-biu-Bong Cross arm Lap outside stomp kick to the body
* Application Defend three straight punches cross arm Biu-biu -Bong lap outside- stomp kick to the body

Block 1 - Exercise 20
On-Demand
This video demonstrates how to defend the double round punch utilizing two sets of the wooden dummy
2
Chapter 2:Wooden Dummy Form and Application

Module 1 Set 1 - Wooden Dummy Set 1 with 2 man Set Application
On-Demand
Wooden Dummy Set 1 Demonstrated on the Dummy, in the air and with a partner

Block 2 Wooden Dummy set 2 - Exercise 1 Wooden Dummy Set 2 with fighting applications
On-Demand
This video demonstratyes Set 2 of the Wooden Dummy form it is demonstrated on the Dummy, in the air and with a partner with combat applications.

Block 3 Wooden Dummy Set 3 - Wooden Dummy Set 3 With Application
On-Demand
This video teaches you how to preform the third set on the Wooden Dummy. The set is demonstrated on the Dummy, in the air and with a partner

Block 4 Wooden dummy set 4 - Exercise 1 Wooden dummy set 4
On-Demand
Wooden dummy set 4 demonstrated on the dummy

Block 4 Wooden dummy set 4 - Exercise 2 Wooden dummy set 4 Application
On-Demand
This video teaches the combat application for the fourth set on the wooden dummy.

Block 5 Wooden Dummy Set 5 - Exercise 1Wooden Dummy Set 5
On-Demand
This Video demonstrates the fifth set on the wooden dummy

Block 5 Wooden Dummy Set 5 - Exercise 2 Wooden Dummy Set 5
On-Demand
Wooden Dummy set 5

Module 6 - Exercise 1 Level 6 Wooden Dummy Form
On-Demand
This video demonstrates Set 6 on the Wooden Dummy

Module 6 - Exercise 2 Set 6 Application
On-Demand
Wooden Dummy Form Set 6 Application

Module 7 - Exercise 1 Wooden Dummy Set 7
On-Demand
Wooden Dummy Set 7

Module 7 - Exercise 2 Wooden Dummy Set 7 Application
On-Demand
Wooden Dummy Set 7 Application

Block 8 - Exercise 1 Wooden Dummy Set 8
On-Demand
This video demonstrates how to do set 8 on the wooden dummy

Block 8 - Exercise 2 Wooden Dummy Set 8 Applications
On-Demand
This video demonstrate the combat application of set 8

Module 9 Wooden Dummy Set 9 - Exercise 1 Wooden Dummy Set 9
On-Demand
Wooden Dummy Set 9 This video demonstrates the solo practice of the set.

Module 9 Wooden Dummy Set 9 - Exercise 2 Wooden Dummy Set 9 Application 1
On-Demand
Wooden Dummy Set 9 Application 1 Defending a front kick and punch.

Module 9 Wooden Dummy Set 9 - Exercise 3 Wooden Dummy Set 9 Application 2
On-Demand
Wooden Dummy Set 9 Application 2

Block 10 Wooden Dummy set 10 - Exercise 1Wooden Dummy Set 10
On-Demand
Wooden Dummy Set 10 solo form of this set.

Block 10 Wooden Dummy set 10 - Exercise 2 Wooden Dummy Set 10 Application
On-Demand
Wooden Dummy Set 10 Application

Block 11 Wooden Dummy Set 11 - Wooden Dummy Set 11
On-Demand
Wooden Dummy Set 11

Block 11 Wooden Dummy Set 11 - Exercise 2 Wooden Dummy Set 11 Application
On-Demand
Wooden Dummy Set 11 Application
Block 12 Wooden Dummy Set 12 - Wooden Dummy Set 12
On-Demand
Wooden Dummy Set 12

Block 12 Wooden Dummy Set 12 - Exercise 2
On-Demand
Wooden Dummy Set 12 Application

Module 13 - Wooden Dummy Set 13
On-Demand
Wooden Dummy Set 13

Block 13 Wooden Dummy Set 13 - Wooden Dummy Set 13 Application 2
On-Demand
Wooden Dummy Set 13 Application 2

Block 13 Wooden Dummy Set 13 - Exercise 2 Wooden Dummy Set 13 Application 1
On-Demand
Wooden Dummy Set 13 Application 1
Block 13 Wooden Dummy Set 13 - Exercise 3 Wooden Dummy Set 13 Application 2
On-Demand
Wooden Dummy Set 13 Application 2
3
Chapter 3 Practicing Chum Kiu On The Wooden Dummy

Block 1 Chum Kiu on the Wooden Dummy - Exercise 1 Chum Kiu Biu Gee On the Wooden Dummy
On-Demand
Chum Kiu Biu Gee On the Wooden Dummy This video demonstrates how to perform the biu gee section of Chum Kiu on the Wooden Dummy.

Block 1 Chum Kiu on the Wooden Dummy - Exercise 2 Chum Kiu Biu Gee application On the Wooden Dummy
On-Demand
Chum Kiu Biu Gee application On the Wooden Dummy

Block 2 Chum Kiu Section 1 on the Wooden Dummy - Exercise 1 Chum Kiu Section 1 on the Wooden Dummy
On-Demand
Chum Kiu Section 1 on the Wooden Dummy

Block 2 Chum Kiu Section 1 on the Wooden Dummy - Exercise 2Chum Kiu Section 1 Application on the Wooden Dummy
On-Demand
Chum Kiu Section 1 Application on the Wooden Dummy

Block 2 Chum Kiu Section 1 on the Wooden Dummy - Exercise 3 Chum Kiu Section 1 Application 2 on the Wooden Dummy
On-Demand
Chum Kiu Section 1 Application 2 on the Wooden Dummy

Block 3 - Exercise 1 Reverse Lap Sao Section
On-Demand
Chum Kiu On The Wooden Dummy Section 2 Takes you through the reverse Lap Sao Section

Block 3 - Exercise 2 Chum Kiu On The Wooden Dummy Section 2 Application
On-Demand
Chum Kiu On The Wooden Dummy Section 2 Application

Block 4Chum Kiu On The Wooden Dummy Section 3 - Exercise 1 Chum Kiu On The Wooden Dummy Section 3
On-Demand
Chum Kiu On The Wooden Dummy Section 2 takes you through the T step Biu Sao Section.

Block 4Chum Kiu On The Wooden Dummy Section 3 - Exercise 2 Chum Kiu On The Wooden Dummy Section 3 Application
On-Demand
Chum Kiu On The Wooden Dummy Section 3 application to the T step Biu Sao and Po Pai palm.

Block 5 End Sequence Gum Sao - Exercise 1 Chum Kiu On The Wooden Dummy End Sequence Gum Sao
On-Demand
Chum Kiu On The Wooden Dummy End Sequence Gum Sao

Block 5 End Sequence Gum Sao - Exercise 2 Chum Kiu On The Wooden Dummy End Sequence Gum Sao Application
On-Demand
Chum Kiu On The Wooden Dummy End Sequence Gum Sao Application to the Gun Sao Section.
4
Chapter 4
8 Wooden Dummy Kicking Actions

Block 1 First Action - Exercise 1: Side kicking - Exercise 1 First Action is called Side Kicking
On-Demand
* First Action is called Side Kicking
Block 1 First Action - Exercise 1: Side kicking - Exercise 2 Application 1
On-Demand
Application Cross Arm defend round kick w/ release step quan sao follow side kick to the supporting leg on the inside

Block 1 First Action - Exercise 1: Side kicking - Exercise 3 Application 2
On-Demand
Application Parallel defend straight punch parallel with quan sao - follow side kick to the front knee on the outside

Block 1 First Action - Exercise 1: Side kicking - Exercise 4 Application 3
On-Demand
Application defend double straight punch parallel with pak - second punch from the short arm release cover with quan - follow front kick to the inside of the front kick on the opposite side

Block 2 Second Action. 3 Motion in 1 - Exercise 1
On-Demand
Wooden Dummy Kicking Second Action. * 3 Motion in 1 - Drill: Gum - tan - bon (cross arm) move outside - Tan mid palm stomp kick - alternate sides.

Block 2 Second Action. 3 Motion in 1 - Exercise 2 Application 1
On-Demand
Application defend the front kick with defend parallel straight punch with tan - defend cross arm round punch with bon- move out side with tan sao-palm strike the body and kick the front leg. The 3 motions are punching, stopping and kicking

Block 2 Second Action. 3 Motion in 1 - Exercise 3 Application 2
On-Demand
Variation parallel pak sao the straight punch defend the cross with tan sao palm strike the body and kick the front leg or the rear leg.

Block 2 Second Action. 3 Motion in 1 - Exercise 4 Application 3
On-Demand
Variation 2 defend the straight punch cross arm with Pak Tan sao and stomp kick the front leg follow lap sao and punch.

Block 3 Third Action Turning - Exercise 1 Third Action Turning
On-Demand

Block 3 Third Action Turning - Exercise 2 Application 1
On-Demand
Application defend round punch cross arm with Bong Sao move outside double Lap Sao kick the side of the leg with whole foot kick .

Block 3 Third Action Turning - Exercise 3 application 2
On-Demand
Application Cross arm Throw straight Punch- Opponent catches you with lap go with the lap- Step trough drop your elbow and turn to double lap then follow low front kick behind your opponents leg

Block 4 Fourth Action Side Kicking 2 - Exercise 1 Fourth Action Side Kicking
On-Demand
This video demonstrates the fourth action of wooden dummy kicking.4. Side Kicking second action Drill: Jut Biu Gum- Release to the jut sao side - biu front kick to the knee then repeat on the opposite side

Block 4 Fourth Action Side Kicking 2 - Exercise 2 Application 1
On-Demand
Application defend the straight punch cross arm with jut sao- defend the second straight punch from the opposite side with a jut from the other hand use a release step - finish shuffle front kick to your opponents opposite leg

Block 4 Fourth Action Side Kicking 2 - Exercise 3 Application 2
On-Demand
Application defend the double round punch cross arm with Jut Sao- Biu Sao- defend the uppercut with Gum Sao- defend the straight punch cross arm Biu Sao front kick

Block 5 Fifth Action V Kicking - Exercise 1 Fifth Action V Kicking
On-Demand

Block 5 Fifth Action V Kicking - Exercise 2 Application
On-Demand
Application defend the straight punch with huen sao - jut sao palm strike.use lim sao front kick the body side kick the knee

Block 6 Sixth Action Stopping Action - Exercise 1 6 Sixth Action Stopping Action
On-Demand

Block 6 Sixth Action Stopping Action - Exercise 2 Application 1
On-Demand
Application defend the straight punch parallel release step pak tsuen - attack the knee with a stomp kick, your opponent steps back side kick the opposite knee slide down the shin and step forward onto the ankle

Block 7 Seventh Action Side Breaking - Exercise 1 Seventh Action Side Breaking
On-Demand

Block 7 Seventh Action Side Breaking - Exercise 2 Application 1
On-Demand
Defend the double straight punch- pak - pak tsuen move to the outside side kick the knee slide dow to the ankle and push in to break * Variation bon sao cross arm move outside wit pak sao side kick the knee slide dow to the ankle and push in to break

Block 8 Eighth Action - Exercise 1 Cross arm double lap to stomp kick.
On-Demand
Cross arm double lap to stomp kick.

Block 8 Eighth Action - Exercise 2 Application
On-Demand
Defend the straight punch with double lap stomp kick the as you pull your opponent forward
5
Chapter 5 Wooden Dummy Interruptions

Block 1 Interruptions - Exercise 1 Dealing with around Punch form the closed side
On-Demand
Exercise 1 Dealing with around Punch form the closed side

Block 1 Interruptions - Exercise 2 Dealing with a round punch to the open side
On-Demand
This is the second in the series of interruptions for set 1 dealing with a round punch to the open side.

Block 1 Interruptions - Exercise 3
On-Demand
This is the third in the series of interruptions for set 1 dealing Here we are interrupting set one with a round punch to the open side and defending with a Pak front kick.

Block 1 Interruptions - Exercise 4
On-Demand
This is the Fourth in the series of interruptions for set 1 dealing with set 1. This is the second in the series of interruptions for set 1 dealing

Block 1 Interruptions - Exercise 5
On-Demand
This is the Fifth in the series of interruptions for set 1 dealing with set 1. Here the interruption comes right before the Fuk Sao in set 1 adding an arm break - stomp kick and elbow

Block 1 Interruptions - Exercise 6
On-Demand
This is the This is the Sixth in the series of interruptions for set 1. This interruption demonstrates what too do when your space is limited utilizing the lao sao.

Block 1 Interruptions - Exercise 7
On-Demand
This is the first interruption for set three following the rule of defending cross arm and kicking.

Block 1 Interruptions - Exercise 8
On-Demand
This is the second interruption for set three.Here our opponent throws a straight vs a round punch.

Block 1 Interruptions - Exercise 9
On-Demand
This video is a training tip on how to effectively train your interruptions

Block 1 Interruptions - Exercise 10
On-Demand
This is the first interruption for Set 5 do 1/2 a Huen Sao then Pak Sao palm follow Lap side Palm - Pak punch do on both sides

Block 1 Interruptions - Exercise 11
On-Demand
This is the second Interruption for set 5. Do 1/2 Huen then double wu dip palm low then high

Block 1 Interruptions - Exercise 12
On-Demand
This video contains 2 interruptions for set 6 with their combat applications.
Set 6 Jut - biu kick same time follow pak punch the pak tsuen lap move to the out side use lap side palm
Set 6 Jut biu gee to the eye follow fuk to quan po pai

Block 1 Interruptions - Exercise 13
On-Demand
This video contains three interruptions with their combat applications
Set 8 after side palm add elbow to the face
Set 8 Sister tech with side palm add front sweep then elbow to the face with back sweep elbow

Block 1 Interruptions - Exercise 14
On-Demand
Set 9 after do a pak sao and back sweep dealing wit 2 round low then high sweep is inside

Block 1 Interruptions - Exercise 15
On-Demand
Set 10 do lim with front kick

Block 1 Interruptions - Exercise 16
On-Demand
Set 11 do biu sao for cross arm 2 punch follow with lap side palm and pak punch.
6
Chapter 6 Wooden Dummy Transition Sets

Block 1 - Exercise 1
On-Demand
This video demonstrates how to transition into set 2 with combat application

Block 1 - Exercise 2
On-Demand
This Video shows you how to transition from set 1 - to set 3 for an interruption on the Wooden Dummy

Block 1 - Variation
On-Demand
This video Demonstrates how to transition between sets one and three on the Wooden Dummy

Block 1 - Exercise 3
On-Demand
Wooden Dummy Transition from set 1 to set 4

Block 1 - Varaition
On-Demand
This video demonstrates transitioning from set one to set four

Block 1 - Exercise 4
On-Demand
Wooden Dummy Transition from set 1 to set 5

Block 1 - Exercise 5
On-Demand
This video demonstrates how to transition between set 1 and set 6 with combat applications

Block 1 - Variation Set One To Set Six
On-Demand
This video demonstrates a variation of a transition from one to set six

Block 1 - Exercise 7
On-Demand
This video demonstrates how to transition between sets 1 and 7 with combat applications

Block 1 - Exercise 8
On-Demand
This Video demonstrates how to transition between sets 1 and 8 with combat application

Block 1 - Exercise 9
On-Demand
This video demonstrates how to transition between sets 1 and set 9

Block 1 - Exercise 10
On-Demand
This video demonstrates how to transition between sets 1 and set 10 with combat application

Block 1 - Exercise 11
On-Demand
This video demonstrates how to transition between sets 1 and 11

Block 1 - Exercise 12
On-Demand
This video demonstrates how to transition between sets 1 and set 12 with combat applications

Block 1 - Exercise 13
On-Demand
This set demonstrates how to transition between sets 1 and 13 with combat applications

Block 1 - Variation Set 6
On-Demand
This Video demonstrates how to transition from set six to the low bong and Po Pai in the Chum Kiu Form

Block 1 - Exercise 16
On-Demand
This video demonstrates how to transition between set four and set six on the dummy
7
Chapter 7 Sam Xin Zhong Saam Sing Zhong(三星级假人) Three Star Dummy

Block 1 - Exercise 1
On-Demand
This video takes you through part one of the Sam Xin Zhong, footwork, kicking and meditation on the left side

Block 1 - Exercise 2
On-Demand
ThisVideo Takes you through the first section oF The Sam Xin Zhong Footwork,Kicking and Meditation on the right side

Block 1 - Exercise 3
On-Demand
This video takes you through the complete sweeping set on the Wing Chun Kicking Dummy.

Block 1 - Exercise 4
On-Demand
This video takes you through the complete Sam Xin Zhong set all aspects to it.
8
Chapter 8 Explosive Wooden Dummy Drills

Block 1 - Exercise 1
On-Demand
1. Set 5 triple huen to pak sao low palm-move out side with bon- tan sao mid palm - stomp kick the knee with outside leg

Block 1 - Exercise 2
On-Demand
2. Double gan outside right bon sao inside across move outside double gan sao on the left repeat alternating side
Meet Your Coach

Keith Mazza
“Building one of the largest online video libraries for learning Traditional Martial arts.”
“If you know the Way broadly, you will see it in everything.”
Miyamoto Musashi
Learn the internal and external aspects of:
*Traditional Wing Chun
*Tai Chi Chuan
*Hsing I (Xing Yi)
*Baguazhang
*Kali
*Qigong
and more…
The videos are easy to follow no matter what level your at and are great for:
-Self defense
- Practical effective skillset development
-Application for real world combat
-meditative practices
-strength training
-wholistic approach to training
Learn how to use the art and why it is so effective.
Keith Mazza is a long time combative arts teacher who is known in the martial arts community as as a teacher of teachers. He was hand-picked by Grandmaster Cheung to train and serve as the North American Liaison for the World Wing Chun Kung Fu Association.
Master Mazza specializes in Traditional Wing Chun and also teaches Tai Chi, Bagua, Xing Yi, Qigong and Kali.
He has earned the title of Master under Grandmaster William Cheung through dedicated practice and pressure testing his skills as he and his mentor traveled around the world. They proved the efficiency of the art by engaging in friendly exchanges, sanctioned fights, unsanctioned fights and challenge matches.
Master Mazza has also successfully ran his own martial arts academy since 1990 and is a certified Combatives and Defensive Tactics Instructor through the Institute of Protection Specialists and Security Contractors (IPSSC). He has been responsible for training and implementing Executive Protection teams both inside and outside the United States.
Be patient and enjoy your practice.
Features
Chat Your Coach
Web + Mobile Apps
Leave Notes
Integrate Wearables
Get Expert Coaching