Go back
$59.99
Reinventing The Steel Mace: Guide Steel Mace & Bodyweight Strength Training
Coach Vaughn’s third ebook showing you how to use the steel mace for more bodyweight strength exercises. This ebook also features how to use rings to better build your strength foundations and then ta... Read More

Reinventing The Steel Mace: Guide Steel Mace & Bodyweight Strength Training
207 On-Demand Videos
1 Attached File
Reinventing The Steel Mace: Guide Steel Mace & Bodyweight Strength Training
On-Demand
1
Intro to RSM

Module 1: RSM Course Overview
On-Demand
2
Mobility & Flexibility Drills

Module 2: RSM Mobility Drill Warm Ups
On-Demand
Module 3: RSM Flexibility Drills
On-Demand
3
Bodyweight Education 101
Module 4: Crawling Tutorial
On-Demand
Before we ever walked we crawled. While I don’t expect you to go back in time; it’s amazing as newborns how mobile we are naturally. However, overtime we lose it just as easily. Crawling builds a strong core because it requires a straight spine and requires the hands & toes marching into the ground for more stability. It’s also a perfect foundational primer for squats and push ups. Notice in the picture below if you flipped it vertical it would be the bottom of a squat. If you have trouble crawling with the hands and feet alternating build up your skills first in the quadraped and perform the bird dog exercise to better connect your lats & glutes at the same time (as demoed in the tutorial).

Module 5: Push Up Tutorial
On-Demand
Half rep push ups have become an epidemic of poor form and give the wrong idea of the purpose of this classic exercise. The push up is all about maintaining a locked in plank (as you see below) with the hands and toes rooted into the ground and the hips being locked in with the glutes and quads to prevent the low back from arching down (also causing the shoulders to shrug).
The hips shouldn’t be too high or too low when setting up. Notice how my ears, shoulders, hips, knees, and ankles are ALL aligned before going into the pushup. Spread the floor to engage the lats, brace the abs, squeeze the glutes, and root your toes to the ground before ever descending down into the pushup. It’s always best to start in the quadraped position and then lockout each leg one at a time. Your start will always dictate your finish and overall performance.

Module 6: Ring Dip Tutorial
On-Demand
This is an advanced exercise that requires full body tension and resilient shoulders. With that said, if your rock bottom push ups and pull ups are not strong — it’s highly advised you do NOT perform dips. It is why ring dips will only be in the advanced workout program. There’s a huge difference between using parallel bars and rings. The rings expose every weak link in your body that isn’t stable. Parallel bars don’t. Flexed wrists are a major weak link with any pressing variation and ring dips are proof of this because it’s impossible do it with them (unless you want to injure them). The knuckles must point toward the ground to keep the wrists neutral so the elbows and shoulders can pull down into the dip with lats flared.
There are still many static dip exercises that will be applied in the intermediate program so you can better learn to externally rotate the elbows into the lats. Make sure your straps are at the right height so you can better de-load the body faster to the ground. This is done by having the rings UNDER your shoulders at the clavicle line to safely press down into the rings with a vertical forearm. Please watch the entire tutorial before trying these.
Module 7: Cossack Tutorial
On-Demand
The best way to describe cossacks is they are deep lateral side squats with one leg squatting, using full hip/knee flexion, as the other leg extends out. These are progressed the same as squats using the rings first and then grooved more into the programming with the steel mace. They represent a lot of what this ebook is about being strong and mobile all at once.

Module 8: 90/90 & Kneeling Tutorial
On-Demand
Many condemn lunges because they experience too much knee pain. When really the issue is they don't know how to find stability in the right places to take less stress off the joint systems. The big and yet very small detail to kneeling progressions is digging the toes to push off the ground. This results in the hips and spine aligning together for better muscle engagement. So instead of focusing on the front loaded shin — drive off the rear big toe when the glutes lock into the hips. The tall kneeling position (where both knees are down) will be used more in the programming to transition into the half kneeling position. These kneeling positions are also great corrective drills for steel mace 360s to keep the hips stable and not kip back & forth. The core also has to work much harder because you’ve taken more than a quarter of the body’s height away; bringing more awareness to the hips staying in alignment and not dumping into the lower back.
Module 9: PLYOMETRIC DOT DRILLS
On-Demand
Plyometric drills are incredible to build better reactive core strength and proprioception (awareness of your body’s limbs). Having a roll of duct tape, chalk, or spray paint to put on the ground is all that’s need for these drills. Make the four ends are little wider than shoulder width, and then place a center dot in the middle. There are four different ones to master in this program below, and an interval clock is needed to get an even amount of work and rest (a free one can be easily downloaded in app format).
4
Steel Mace Education 101

Module 10: Steel Mace 2H 360 Tutorial
13 minutes
·On-Demand
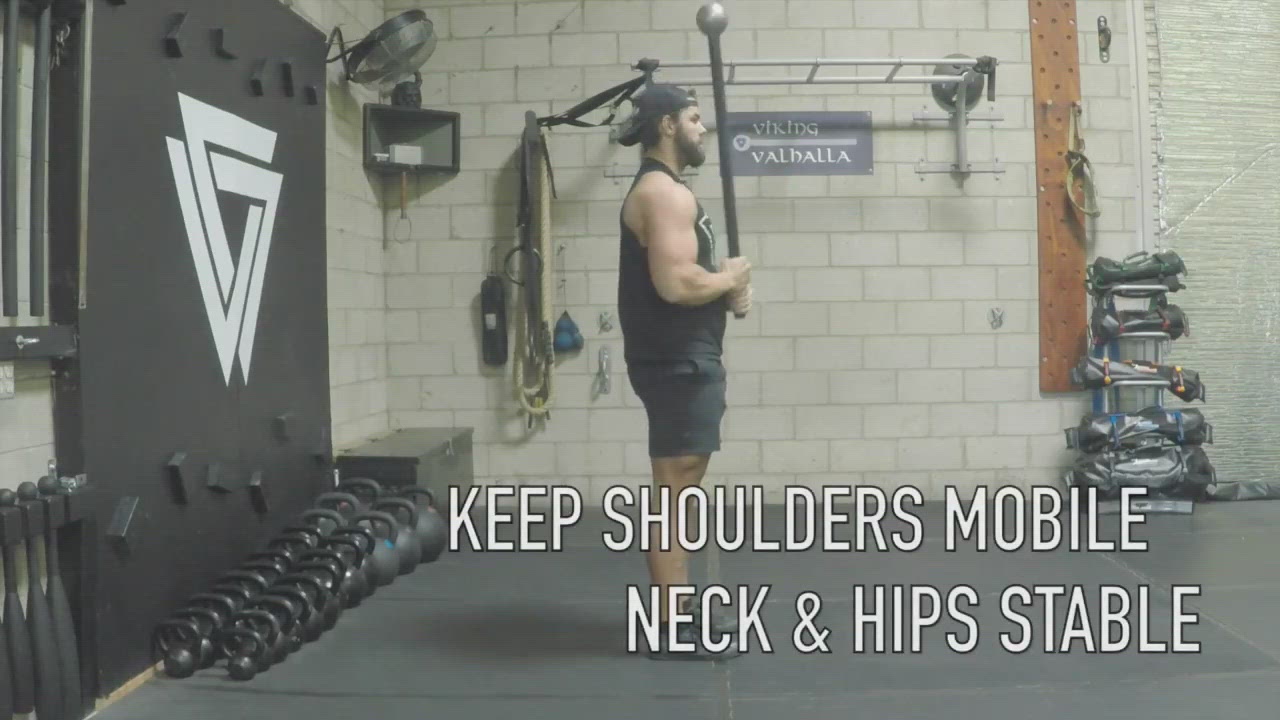
Once your strength skills with the mace have progressed, teaching the body to keep the shoulders mobile and the hips stable is the next skill to learn. Just like how the kettlebell swing is at the center of the kettlebell universe — the same goes for mace 360’s. If your mace 360 looks unbalanced, then it’ll be no surprise the rest of the movements covered in this ebook will also have the same result. This is a big reason why, in the beginner RSM program, push & pull strength exercises are implemented first so that you start off with a solid foundation to build on throughout the program levels.
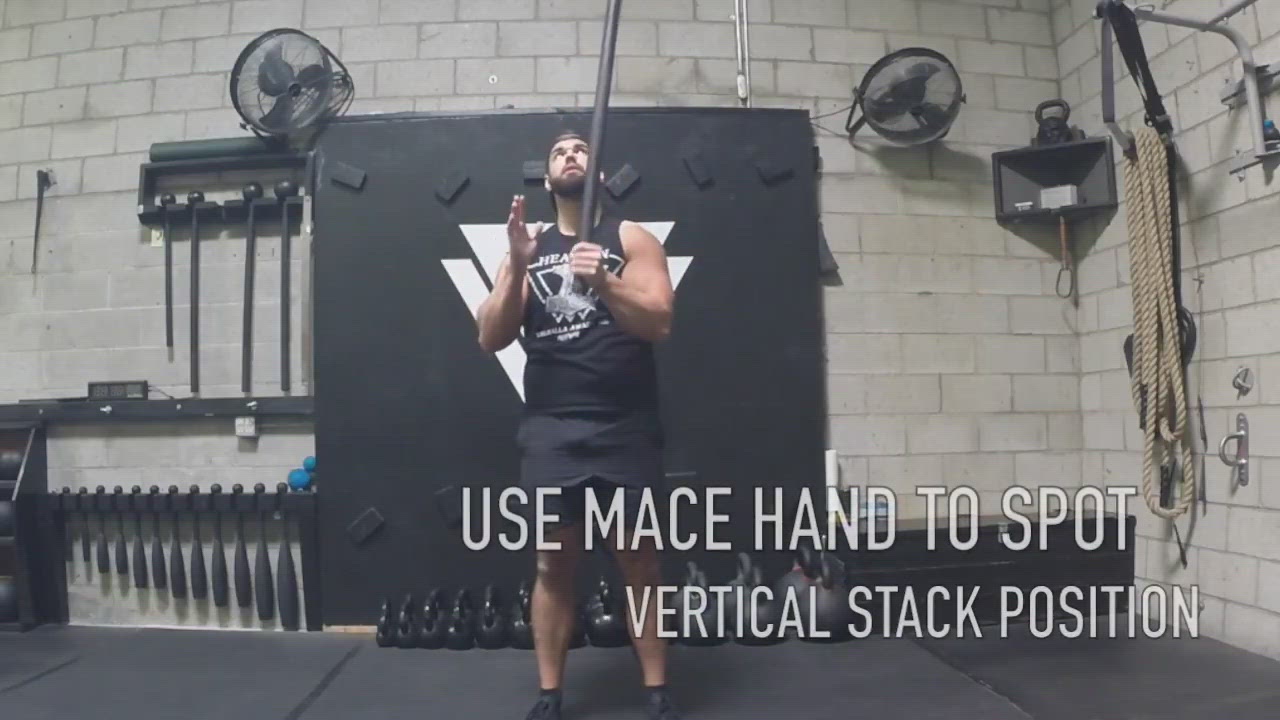
The difference between a 360 and a 10 & 2 is the direction they go in. The 360 goes in ONE continuous direction coming back to the vertical stack (12 o’clock) position each time allowing for more control on each rep. The 10 & 2 pushes & pulls in BOTH directions. This why I always tell beginners it really doesn't matter which top or bottom hand you want to start pushing with because you’re going to do both regardless when advancing to 10 & 2’s. What makes them more difficult is the accelerated force that builds the longer you 10 & 2 the mace. So much more core stability is needed and is why you’ll see A LOT of novices online looking like they’re dancing and hula hooping around the mace with their hips from that lack of strength.
Having a strong sense of needing shoulder mobility and hip stability when swinging the mace into a 360 or 10 & 2 pattern is necessary to perform the more advanced RSM 360s progressions further in the programming. Switching your grip in the vertical stack position is key to getting BOTH sides when adding in complexes with lunges and squats with 360s flowing into them. The Steel Mace 360 Kneeling Complex is the best example. I personally like to push with my base hand, and then point the index finger with it to cue the direction it’s going in when I go to tall kneeling, half kneeling, standing and reversing back. THEN I switch my grip and perform the next side. The vertical stack is not just a name. It is a major part of the system to make sure you’re getting an even amount of strength on BOTH sides with the other foundational movement patterns we covered in the Bodyweight 101 Education chapter.

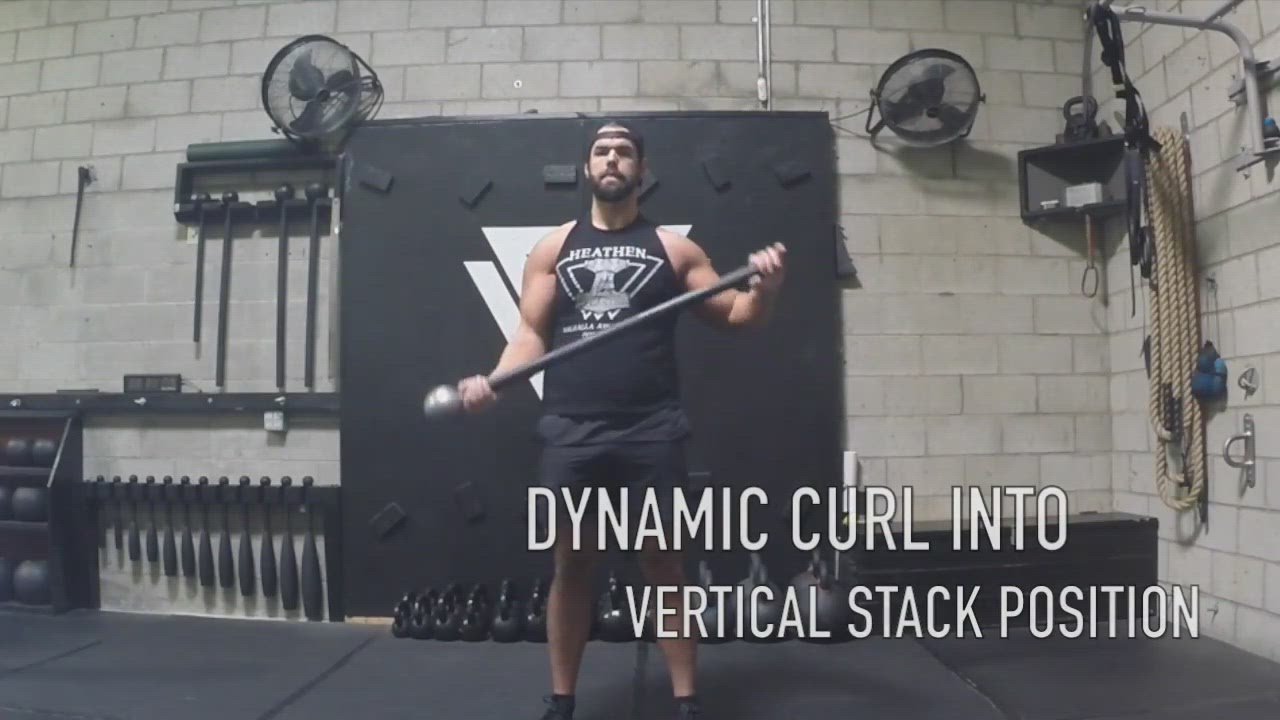
Module 11: Dynamic Curl Tutorial
On-Demand
What makes the mace so unique is it’s asymmetrical load. Knowing how to properly push and pull the mace smoothly into different positions is key for steel mace training. Your mace hand (the one closest to the mace head) will be PALM UP — the base hand (one the bottom handle) will be PALM DOWN to set up. The mace hand will then pull up curling as the base pushes down to smoothly bring both hands in the middle of the mace handle. This is called the prayer position. The palms need to press against the handle so it can transition, slide, and alternate to the other side. To do so, the finger tips must spread out for a quick second to avoid death gripping. Many compensate by tossing the mace side to side (letting go of the mace in mid air with one hand). This action only damages your wrists and hands as the handle slams down.
The hands should never leave the steel mace handle. It’s essential for the front rack and goblet positions as you go further into the programming. You’ll hear “BREAK THE BAR” a lot in many of the exercises as you go from a relaxed dynamic curl into tight contracted positions to keep the lats engaged for better squats, lunges, and cossacks.

Module 12: Steel Mace Swing & Catch Tutorial
On-Demand
- Prerequisite #1: Steel Mace Hip Hinge Drill
- Prerequisite #2: Hardstyle Kettlebell Swing
- Steel Mace Swing & Slide - Level 1 Beginner
- Steel Mace Swing & Catch - Level 2 Intermediate
- Steel Mace Hand to Hand Swing & Catch - Level 3 Advanced

Module 13: Steel Mace Uppercut Tutorial
On-Demand
UPPERCUTS:
When ever my students are having a bad day I just make them visualize something (or someone) they don’t like in front of them and do this exercise. While it’s aggressive, it’s very methodical to learn in the start to keep each position solid with no wrist flexion (common compensation) and solid pivot mechanics to develop more power with each rep. As you see in the picture below, it’s best to keep the cadence “center, elbow, and uppercut...center, elbow, uppercut” in your head to make it robotic and more fluid in each position. These also flow very well into back step lunge uppercuts as the program advances.

Module 14: Steel Mace Striking Chop Tutorial
On-Demand
If the steel mace was a weapon it would be an axe. This this where we get more into warrior mode, and add these athletic striking chop variations. These advance more into shuffles and switch patterns (striking left to right). As you can see below, we’ll be going low, mid, and high throughout the programming. All of them require you to have your mace hand palm up and base hand palm down to push and pull the mace handle for more power in each height. Also, notice how the pivoting mechanics on the rear foot all look the same in comparison to the three.
Please know you do not have to go heavy with these striking patterns because we want to demonstrate athleticism, speed, and power from the ground up. I have women use a 10lb mace and men use a 15lb at the heaviest. Remember to PULL with your base hand just as hard as you PUSH with your mace hand. You do not want to muscle these strikes with the mace hand doing all the work or else it will stress out your shoulders.

Module 15: Steel Mace Pike Tutorial
On-Demand
This is an oldetime strongman feat I learned from Iron Tamer David Whitley. This guy reinvents steel by bending it with his bare hands. I don’t mind you using a sledgehammer because the hammer’s shape contours to the arc of the pike and it has a shorter handle versus the length of a steel mace’s handle.
To set up, vertically stack the mace and go single arm pressing the mace out to the side of your body. Once the arm is fully locked, bend at the wrist letting the mace head pike down toward the side of the face (NOT on your face obviously). Stop the mace by crush gripping it, and bringing the wrist neutral as the mace goes back up vertically. Squeeze your free hand and this will increase more strength output to the pressing side by contracting the lats better. If you have trouble piking try having a kettlebell in a clean position in the other hand to counter balance the pike’s arc.

Module 16: Steel Mace Push Up Tutorial
On-Demand
All the standards we covered in the push up section will apply here. The big difference is one hand will be on the mace head and the other palm down on the base hand. This will make you automatically break your plank and instantly want to shift to the mace head side. So, knowing how to resist rotation will be very key to execute. This is why basic push ups, Ring Rock Bottom Push Ups, and shoulder tap planks are programmed through the beginner and intermediate workouts to build your pressing skills for this exercise.
When first setting up get one hand on the top of the mace head and the other base hand palm down. Be sure to use a heavier 15-25lb mace so you have more to crush grip and will be stable on the ground (do NOT perform on a slick surface like astro turf). Once the grip is set, dig your toes hard into the ground (you’ll notice the leg opposite of the macehead will want to lift off the ground). As you pull yourself down, use the mace handle to your advantage as a safety net with the base hand pulling it against your sternum. Once the forearm is vertical and the body is fully planked at the bottom — drive up hard externally rotating the elbow pit locked out. Perform no more than 3-5 reps. If you can do more — then do them slower. These will evolve into steel mace 360 burpees in the next chapter.
5
RSM Beginner Workout #1

Module 17: Steel Mace Dynamic Curls
On-Demand
PERFORM FOR 30-45 SEC
3 SETS
Module 18: Ring Low Rows
On-Demand
RING LOW ROWS: 10 REPS
+
RING PUSH UPS: 10 REPS
4 ROUNDS
Module 19: Ring Push Up
On-Demand
RING LOW ROWS: 10 REPS
+
RING PUSH UPS: 10 REPS
4 ROUNDS

Module 20: Steel Mace Bent Over Row
On-Demand
MACE BENT OVER ROWS: 6-8 REPS L/R
+
MACE PRESSOUTS: 6-8 REPS L/R
4 ROUNDS

Module 21: Steel Mace Pressouts
On-Demand
MACE BENT OVER ROWS: 6-8 REPS L/R
+
MACE PRESSOUTS: 6-8 REPS L/R
4 ROUNDS

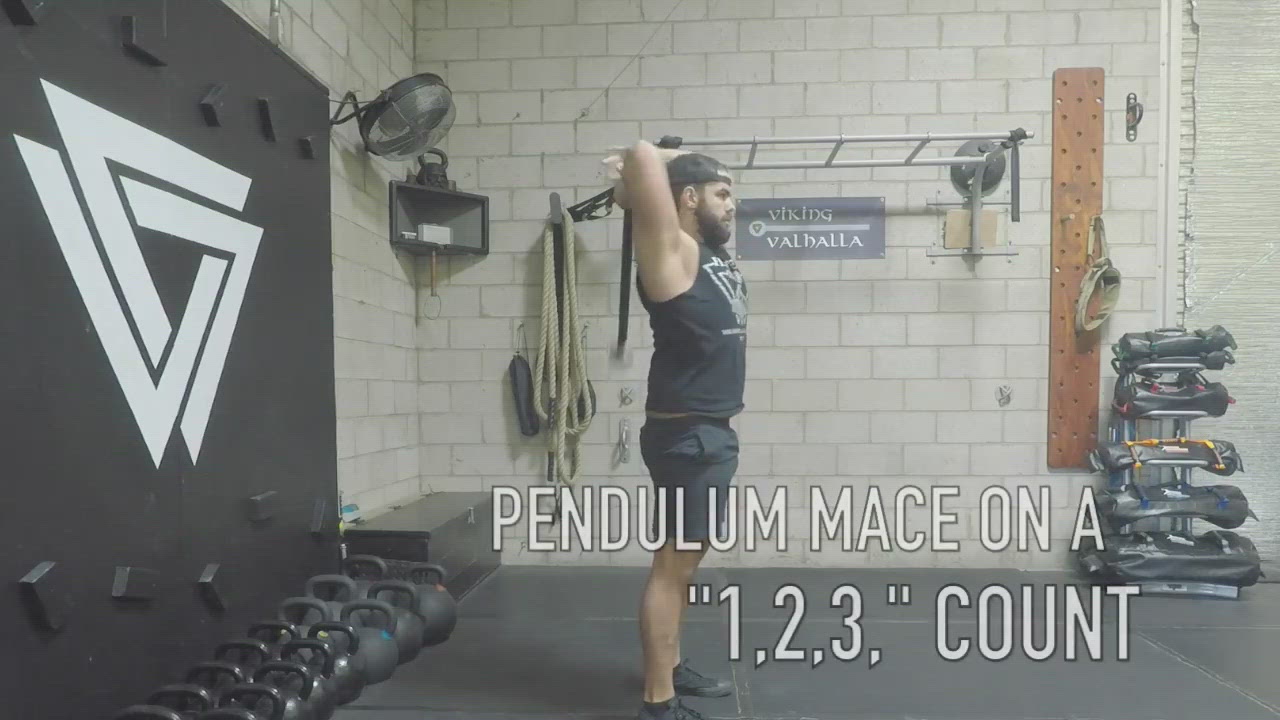
Module 22: Steel Mace Pendulums
On-Demand
PERFORM FOR 30-45 SEC
3 SETS
6
RSM Beginner Workout #2
Module 23: Ring Forward Y Fly Lunges
On-Demand
PERFORM FOR 30-45 SEC
3 SETS
Module 24: Ring Squats
On-Demand
RING SQUATS: 10 REPS
+
RING BACK STEP LUNGES: 6 REPS (L/R = 1 REP)
PERFORM 4 ROUNDS
Module 25: Ring Back Step Lunges
On-Demand
RING SQUATS: 10 REPS
+
RING BACK STEP LUNGES: 6 REPS (L/R = 1 REP)
PERFORM 4 ROUNDS
Module 26: Steel Mace Dynamic Lap Squats
On-Demand
MACE LAP SQUATS: 5 REPS (L/R=1REP)
+
MACE SIDE STEP LUNGES: 5 REPS (L/R=1REP)
4 ROUNDS

Module 27: Steel Mace Dynamic Side Step Lunges
On-Demand
MACE LAP SQUATS: 5 REPS (L/R=1REP)
+
MACE SIDE STEP LUNGES: 5 REPS (L/R=1REP)
4 ROUNDS
7
RSM Beginner Workout #3
Module 28: Tall to Half Kneeling
On-Demand
PERFORM FOR 30-45 SEC
3 SETS

Module 29: Shoulder Tap Plank
On-Demand
SHOULDER TAP PLANK: PERFORM FOR 30-45SEC
+
BEAR CRAWLS: BACK & FORTH: 10 Yards & Back
3 ROUNDS

Module 30: Bear Crawls- Front to Back
On-Demand
SHOULDER TAP PLANK: PERFORM FOR 30-45SEC
+
BEAR CRAWLS: BACK & FORTH: 10 Yards & Back
3 ROUNDS
Module 31: Hip Press to Leg Extension
On-Demand
5 REPS (L/R = 1 REP)
3 SETS
Module 32: Steel Mace Tall Kneeling Pendulums
On-Demand
PERFORM FOR 30-45 SEC
3 SETS
8
RSM Beginner Workout #4
Module 33: Steel Mace Dynamic Curl to Hockey Slap Shot
On-Demand
10 REPS EACH SIDE
3 SETS (L/R = 1 SET)

Module 34: Steel Mace Uppercuts
On-Demand
10 REPS EACH SIDE
3 SETS (L/R = 1 SET)
Module 35: Steel Mace 3-D Step Lunge Complex
On-Demand
ALL = 1 - PERFORM 3 REPS
3 SETS
Module 36: Steel Mace Viking Strike
On-Demand
10 REPS EACH SIDE
3 SETS (L/R = 1 SET)
9
RSM Beginner Workout #5

Module 37: Steel Mace 2H 360s
On-Demand
10 REPS EACH SIDE
4-5 SETS
Module 38: Ring Bicep Curls
On-Demand
RING BICEP CURLS: 10 REPS
+
RING TRICEP PRESS: 10 REPS
4 ROUNDS
Module 39: Ring Tricep Press
On-Demand
RING BICEP CURLS: 10 REPS
+
RING TRICEP PRESS: 10 REPS
4 ROUNDS

Module 40: Steel Mace Offset Military Press
On-Demand
OFFSET MILITARY PRESS: 6-8 REPS L/R
+
BENT OVER ROW: 6-8 REPS L/R
4 ROUNDS

Module 41: Steel Mace Bent Over
On-Demand
OFFSET MILITARY PRESS: 6-8 REPS L/R
+
BENT OVER ROW: 6-8 REPS L/R
4 ROUNDS
10
RSM Beginner Workout #6

Module 42: Ring Forward Y Fly Lunges
On-Demand
PERFORM FOR 30-45 SEC
3 SETS
Module 43: Ring Rock Bottom Squats
On-Demand
RING ROCK BOTTOM SQUATS: 6 REPS
+
RING SIDE BALANCE LUNGES: 6 REPS L/R = 1 REP
4 ROUNDS
Module 44: Ring Side Balance Lunges
On-Demand
RING ROCK BOTTOM SQUATS: 6 REPS
+
RING SIDE BALANCE LUNGES: 6 REPS L/R = 1 REP
4 ROUNDS
Module 45: Steel Mace Pendulum to Front Squat
On-Demand
MACE PENDULUM TO FRONT SQUATS: 5 REPS L/R = 1 REP
+
MACE 360 BACK STEP LUNGE PRESSOUTS: 5 REPS L/R = 1 REP
PERFORM 4 ROUNDS
Module 46: Steel Mace 360 Back Step Lunge Pressouts
On-Demand
MACE PENDULUM TO FRONT SQUATS: 5 REPS L/R = 1 REP
+
MACE 360 BACK STEP LUNGE PRESSOUTS: 5 REPS L/R = 1 REP
PERFORM 4 ROUNDS
11
RSM Beginner Workout #7

Module 47: Tall to Half Kneeling
On-Demand
TALL TO HALF KNEELING: 10 REPS (L/R=1REP)
+
HIP PRESS TO LEG EXTENSION: 5 REPS (L/R = 1 REP)
3 ROUNDS

Module 48: Hip Press to Leg Extension
On-Demand
TALL TO HALF KNEELING: 10 REPS (L/R=1REP)
+
HIP PRESS TO LEG EXTENSION: 5 REPS (L/R = 1 REP)
3 ROUNDS
Module 49: Ring Squat to Pull Up
On-Demand
RING SQUAT TO PULL UP: 6-8 REPS
+
BEAR CRAWL: SIDE TO SIDE: 10 YARDS & BACK
4 ROUNDS

Module 50: Bear Crawls: Side to Side
On-Demand
RING SQUAT TO PULL UP: 6-8 REPS
+
BEAR CRAWL: SIDE TO SIDE: 10 YARDS & BACK
4 ROUNDS

Module 51: Steel Mace Half Kneeling 360s
On-Demand
10 REPS EACH SIDE
3 SETS
12
RSM Beginner Workout #8
Module 52: Steel Mace Balance 360s
On-Demand
6 REPS EACH SIDE
4 SETS
Module 53: Steel Mace Shuffle Step Hockey Slap Shot
On-Demand
MACE SHUFFLE TO HOCKEY SLAP SHOT: 6 REPS EACH SIDE
+
MACE VIKING STRIKES: 6 REPS EACH SIDE
4 ROUNDS
L/R = 1 SET FOR BOTH

Module 54: Steel Mace Viking Strike
On-Demand
MACE SHUFFLE TO HOCKEY SLAP SHOT: 6 REPS EACH SIDE
+
MACE VIKING STRIKES: 6 REPS EACH SIDE
4 ROUNDS
L/R = 1 SET FOR BOTH

Module 55: Steel Mace Dynamic Walking Lunges
On-Demand
10 YARDS & BACK
4 SETS
13
RSM Beginner Workout #9
Module 56: Steel Mace 2H 360s
On-Demand
10 REPS EACH SIDE
4-5 SETS
Module 57: Ring High Rows
On-Demand
RING HIGH ROWS: 10 REPS
+
RING PUSH UPS: 10 REPS
3 ROUNDS

Module 58: Ring Push Up
On-Demand
RING HIGH ROWS: 10 REPS
+
RING PUSH UPS: 10 REPS
3 ROUNDS
Module 59: Ring Single Bicep Curl
On-Demand
RING SINGLE ARM BICEP CURLS: 6 REPS EACH SIDE
+
RING TRICEP PRESS: 10 REPS
3 ROUNDS

Module 60: Ring Tricep Press
On-Demand
RING SINGLE ARM BICEP CURLS: 6 REPS EACH SIDE
+
RING TRICEP PRESS: 10 REPS
3 ROUNDS

Module 61: Steel Mace Pendulum to Offset Military Press
On-Demand
5 REPS EACH SIDE
3 SETS L/R = 1 SET
14
RSM Beginner Workout #10

Module 62: Ring Rock Bottom Squats
1 minute
·On-Demand
RING ROCK BOTTOM SQUATS: 3 REPS
+
RING FORWARD Y FLY LUNGES: PERFORM FOR 30SEC
3 ROUNDS
Module 63: Ring Forward Y Fly Lunges
On-Demand
RING ROCK BOTTOM SQUATS: 3 REPS
+
RING FORWARD Y FLY LUNGES: PERFORM FOR 30SEC
3 ROUNDS

Module 64: Steel Mace Dynamic Lap Squats
On-Demand
5 REPS
L/R = 1 REP
3 SETS
Module 65: Steel Mace Dynamic Side Step Lunges
On-Demand
5 REPS
L/R = 1 REP
3 SETS

Module 66: Ring Back Step Lunges
On-Demand
5 REPS
L/R = 1 REP
3 SETS
15
RSM Beginner Workout #11
Module 67: Tall to Half Kneeling
On-Demand
TALL TO HALF KNEELING
+
HOLLOW ROCKING
PERFORM FOR 30SEC FOR BOTH / 30 SECONDS REST
3 ROUNDS
Module 68: Hollow Rocking
On-Demand
TALL TO HALF KNEELING
+
HOLLOW ROCKING
PERFORM FOR 30SEC FOR BOTH / 30 SECONDS REST
3 ROUNDS
Module 69: 90/90 Get Up
On-Demand
1 REP (L/R = 1 REP)
4 SETS

Module 70: Steel Mace 360 Kneeling Complex
On-Demand
1 REP EACH SIDE
4 SETS
L/R = 1 SET
Module 71: Ring Crunch Deadstops
On-Demand
5-8 REPS
4 SETS

Module 72: Bear Crawl to Push Up
On-Demand
5-8 REPS
4 SETS
16
RSM Beginner Workout #12
Module 73: Ring Sprinter Start
On-Demand
10 REPS EACH SIDE
3 SETS (L/R = 1 SET)

Module 74: Steel Mace Balance 360s
On-Demand
10 REPS EACH SIDE
3 SETS - L/R = 1 SET
Module 75: Steel Mace Uppercuts
On-Demand
10 REPS EACH SIDE
3 SETS - L/R = 1 SET
Module 76: Steel Mace Dynamic Walking Lunges
On-Demand
10 YARDS & BACK
3 SETS
17
RSM Intermediate Workout #1
Module 77: Steel Mace Dynamic Curl to 360
On-Demand
MACE 360 TO DYNAMIC CURL 10 REPS L&R
+
FIST PUSH UPS: 10 REPS
PERFORM 3-4 ROUNDS

Module 78: Fist Push Up
On-Demand
MACE 360 TO DYNAMIC CURL 10 REPS L&R
+
FIST PUSH UPS: 10 REPS
PERFORM 3-4 ROUNDS
Module 79: Ring Single Arm Row
On-Demand
6-8 REPS EACH SIDE
3-4 SETS
Module 80: Steel Mace 1H Military Press
On-Demand
6-8 REPS EACH SIDE
3-4 SETS
Module 81: Ring Lat Pulldown
On-Demand
6-8 REPS
3-4 SETS
18
RSM Intermediate Workout #2

Module 82: Steel Mace Dynamic Lap Squat to Side Step Lunge
On-Demand
6-8 REPS
3 SETS
Module 83: Ring Overhead Squat
On-Demand
6-8 REPS
4 SETS (L/R = 1 SET)
Module 84: Ring Back Balance Lunges
On-Demand
6-8 REPS EACH SIDE
3 SETS (L/R = 1 SET)

Module 85: Steel Mace 360 Squat Pressouts
On-Demand
6-8 REPS EACH SIDE
3 SETS L/R = 1 SET
19
RSM Intermediate Workout #3

Module 86: Steel Mace 90/90 Hip Press to 360
On-Demand
MACE 90/90 HIP PRESS TO 360: 6-8 REPS EACH SIDE / 3 SETS (L&R=1 SET)
REST AS LITTLE
Module 87: Ring Crunch Deadstops
On-Demand
RING CRUNCH DEADSTOPS: 6-8 REPS
+
BEAR CRAWL: SIDEWAYS: 10 YARDS & BACK
PERFORM 4 ROUNDS
Module 88: Bear Crawls: Side to Side
On-Demand
RING CRUNCH DEADSTOPS: 6-8 REPS
+
BEAR CRAWL: SIDEWAYS: 10 YARDS & BACK
PERFORM 4 ROUNDS

Module 89: Hollow Rocking
On-Demand
HOLLOW ROCKING
+
SHOULDER TAP PLANK
PERFORM FOR 30SEC FOR BOTH / 30 SECONDS REST
4 ROUNDS
Module 90: Shoulder Tap Plank
On-Demand
HOLLOW ROCKING
+
SHOULDER TAP PLANK
PERFORM FOR 30SEC FOR BOTH / 30 SECONDS REST
4 ROUNDS
20
RSM Intermediate Workout #4
Module 91: Dot Drill: Hopscotch
On-Demand
30 SEC ON / 30 SEC OFF
4 SETS
Module 92: Steel Mace Swing & Catch
On-Demand
10 REPS EACH SIDE
3 SETS
Module 93: Steel Mace Balance 360s to Side Lunge
On-Demand
10 REPS EACH SIDE
3 SETS
Module 94: Steel Mace Back Step Lunge Uppercuts
On-Demand
10 REPS EACH SIDE
3 SETS
21
RSM Intermediate Workout #5
Module 95: Steel Mace 10&2s
On-Demand
MACE 10 & 2’s: PERFORM FOR 1MIN
+
MACE PIKES: 2-3 REPS EACH SIDE
4 ROUNDS

Module 96: Steel Mace Pikes
On-Demand
MACE 10 & 2’s: PERFORM FOR 1MIN
+
MACE PIKES: 2-3 REPS EACH SIDE
4 ROUNDS

Module 97: Ring Y Flys
1 minute
·On-Demand
RING Y FLYS: 10 REPS
+
MACE PUSH UPS: 5 REPS EACH SIDE
4 ROUNDS
Module 98: Steel Mace Push Ups
On-Demand
RING Y FLYS: 10 REPS
+
MACE PUSH UPS: 5 REPS EACH SIDE
ROUNDS 4

Module 99: Ring Lat Pulldown
On-Demand
5-8 REPS
3-4 SETS

Module 100: Steel Mace Ground & Pound
On-Demand
PERFORM FOR 1MIN / REST 1MIN
3-4 SETS
22
RSM Intermediate Workout #6

Module 101: Steel Mace Dynamic Cossacks
On-Demand
3 REPS
3-4 SETS

Module 102: Steel Mace Squat Complex
1 minute
·On-Demand
ALL = 1 REP Perform 3 REPS
3-4 SETS

Module 103: Ring Back Balance Lunges
On-Demand
6 REPS EACH SIDE
2 SETS (L/R = 1 SET)

Module 104: Ring Side Balance Lunges
On-Demand
6 REPS EACH SIDE
2 SETS (L/R = 1 SET)

Module 105: ing Cross Balance Lunges
On-Demand
6 REPS EACH SIDE
2 SETS (L/R = 1 SET)
23
RSM Intermediate Workout #7
Module 106: Steel Mace 90/90 Get Up with 360s
On-Demand
1 REP (L/R = 1 REP)
4 SETS
Module 107: Ring Crunch to Leg Extension Deadstops
On-Demand
RING CRUNCH TO LEG EXTENSION DEADSTOPS: 3-5 REPS
+
HINDU PUSH UPS: 10 REPS
4-5 ROUNDS

Module 108: Hindu Push Up
On-Demand
RING CRUNCH TO LEG EXTENSION DEADSTOPS: 3-5 REPS
+
HINDU PUSH UPS: 10 REPS
4-5 ROUNDS
Module 109: Steel Mace 360 Kneeling Complex
On-Demand
MACE 360 KNEELING COMPLEX: 1 REP (L/R=1REP)
+
RING JUMP TO STATIC DIPS: 3 REPS
4-5 ROUNDS
Module 110: Ring Top Dip Postion (Static Hold)
On-Demand
MACE 360 KNEELING COMPLEX: 1 REP (L/R=1REP)
+
RING JUMP TO STATIC DIPS: 3 REPS
4-5 ROUNDS
24
RSM Intermediate Workout #8
Module 111: Dot Drills: Two-Foot Hops
On-Demand
30 SEC ON / 30 SEC OFF
4 SETS

Module 112: Steel Mace H2H Swing & Catch
On-Demand
1MIN ON / 1MIN OFF
4 SETS

Module 113: Steel Mace Shuffle Step Hockey Slap Shot
On-Demand
MACE SHUFFLE STEP HOCKEY SLAP SHOT: 10 REPS EACH SIDE
+
MACE GROUND & POUND: PERFORM FOR 30-45 SEC
4 ROUNDS
Module 114: Steel Mace Ground & Pound
On-Demand
MACE SHUFFLE STEP HOCKEY SLAP SHOT: 10 REPS EACH SIDE
+
MACE GROUND & POUND: PERFORM FOR 30-45 SEC
4 ROUNDS

Module 115: Ring Sprinter Start
1 minute
·On-Demand
10 REPS EACH SIDE
3 SETS (L/R = 1 SET)
25
RSM Intermediate Workout #9
Module 116: Steel Mace 1H 360s
On-Demand
MACE 1H 360s: 10 REPS L&R
+
MACE PIKESS: 2-3 REPS L&R
3-4 ROUNDS
Module 117: Steel Mace Pikes
On-Demand
MACE 1H 360s: 10 REPS L&R
+
MACE PIKESS: 2-3 REPS L&R
3-4 ROUNDS
Module 118: Ring Lat Pulldown to Y Fly
On-Demand
5 REPS
3-4 SETS

Module 119: Steel Mace Push Ups
On-Demand
MACE PUSH UPS: 5 REPS EACH SIDE
+
RING INVERTED ROWS: 5 REPS
ROUNDS 3-4
Module 120: ing Inverted Low Rows
On-Demand
MACE PUSH UPS: 5 REPS EACH SIDE
+
RING INVERTED ROWS: 5 REPS
ROUNDS 3-4

Module 121: Steel Mace 2H Figure 8
On-Demand
10 REPS EACH SIDE
3-4 SETS L/R = 1 SET
26
RSM Intermediate Workout #10
Module 122: Steel Mace 3-D Lunge Flow
On-Demand
ALL = 1 REP Perform 3 REPS
3 SETS
Module 123: Steel Mace Single Leg Deadlift
On-Demand
5 REPS (L/R = 1 REP)
3-4 SETS
Module 124: Steel Mace Pendulum Front Squat Offset Military Press
On-Demand
5 REPS EACH SIDE
3 SETS
Module 125: Steel Mace Dynamic Cossacks
On-Demand
3 REPS EACH SIDE
3 SETS
27
RSM Intermediate Workout #11

Module 126: Steel Mace 90/90 Get Up with 360s
On-Demand
MACE 90/90 360 GET UP WITH 360s: 1 REP EACH SIDE
+
MACE PUSH UPS: 5 REPS EACH SIDE
3 ROUNDS
Module 127: Steel Mace Push Ups
On-Demand
MACE 90/90 360 GET UP WITH 360s: 1 REP EACH SIDE
+
MACE PUSH UPS: 5 REPS EACH SIDE
3 ROUNDS
Module 128: Ring Jump to Chin Up
On-Demand
5 REPS
4-5 SETS

Module 129: Ring Top Dip Postion (Static Hold)
On-Demand
2-3 REPS
4-5 SETS

Module 130: Ring Crunch to Leg Extension Deadstops
On-Demand
3-5 REPS
4-5 SETS
28
RSM Intermediate Workout #12
Module 131: Dot Drill: Criss-Cross
On-Demand
30 SEC ON / 30 SEC OFF
4 SETS

Module 132: Steel Mace H2H Rotational Swing & Catch
On-Demand
45 SEC ON / 30 SEC OFF
4 SETS

Module 133: Steel Mace Balance 360s to Cross Lunge
On-Demand
5 REPS EACH SIDE
3 SETS

Module 134: Dot Drill: Criss-Cross
On-Demand
30 SEC ON / 30 SEC OFF
4 SETS
29
RSM Advanced Workout #1

Module 135: Steel Mace 2H Walking 10&2
On-Demand
MACE WALKING 10&2’s: WALK 10-15 Yards & Back / 4 SETS
REST AS LITTLE
Module 136: Steel Mace 1H 360s
On-Demand
10 REPS EACH SIDE
4 SETS

Module 137: ing Inverted Low Rows
On-Demand
RING INVERTED ROWS: 6-8 REPS
+
RING ROCK BOTTOM: 5 REPS
5 ROUNDS
Module 138: Ring Rock Bottom Push Up
On-Demand
RING INVERTED ROWS: 6-8 REPS
+
RING ROCK BOTTOM: 5 REPS
5 ROUNDS
Module 139: Steel Mace 2H Figure 8
On-Demand
10 REPS EACH SIDE
3-4 SETS L/R = 1 SET
REST 30-45 SEC IN BETWEEN SIDES
30
RSM Advanced Workout #2
Module 140: Steel Mace Squat Complex
1 minute
·On-Demand
ALL = 1 REP Perform 3 REPS
3-4 SETS
Module 141: Steel Mace Balance Lunge 360 3-D Complex
On-Demand
1 REP (ALL 3 = 1 REP)
3-4 SETS

Module 142: Steel Mace Thor Cossack
On-Demand
MACE THOR COSSACKS: 5 REPS EACH SIDE
3-4 SETS
Module 143: Steel Mace Static Back Step Lunge 360s
On-Demand
6-8 REPS EACH SIDE
3-4 SETS
31
RSM Advanced Workout #3
Module 144: Steel Mace Tall to Half Kneeling Balance Lunges
On-Demand
5 REPS
L/R = 1 REP
4 SETS
Module 145: Ring Chin Ups
On-Demand
RING CHIN UPS: 3-5 REPS
+
HOLLOW ROCKING: PERFORM FOR 30 SEC
4-5 ROUNDS
Module 146: Hollow Rocking
On-Demand
RING CHIN UPS: 3-5 REPS
+
HOLLOW ROCKING: PERFORM FOR 30 SEC
4-5 ROUNDS
Module 147: Ring Leg Raises
On-Demand
HANGING LEG RAISES: 3-5 REPS
+
BEAR CRAWL: FRONT: 10 Yards & Backward
4-5 ROUNDS
Module 148: Bear Crawls- Front to Back
On-Demand
HANGING LEG RAISES: 3-5 REPS
+
BEAR CRAWL: FRONT: 10 Yards & Backward
4-5 ROUNDS
32
RSM Advanced Workout #4
Module 149: Dot Drill: Hop to Cross
On-Demand
30 SEC ON / 15 SEC OFF
2 SETS
Module 150: Steel Mace Step Up to 360
On-Demand
MACE STEP UP 360s: 6 REPS EACH SIDE
+
MACE HIGH AXE CHOPS: 6 REPS EACH SIDE
5 ROUNDS
Module 151: Steel Mace High Axe Chops
On-Demand
MACE STEP UP 360s: 6 REPS EACH SIDE
+
MACE HIGH AXE CHOPS: 6 REPS EACH SIDE
5 ROUNDS

Module 152: Steel Mace Dynamic Curl Shuffle Hockey Slap Shot
On-Demand
45 SEC ON / 30 SEC OFF
5 SETS

Module 153: Dot Drill: Hop to Cross
On-Demand
30 SEC ON / 15 SEC OFF
2 SETS
33
RSM Advanced Workout #5

Module 154: Steel Mace Walking H2H 10&2
On-Demand
WALK 10-15 YARDS TO BACKWARD
3 SETS
Module 155: Ring Hip Hinge to Rock Bottom Push Up
On-Demand
3-5 REPS
4 SETS
Module 156: Ring Single Arm Row
On-Demand
RING SINGLE ARM ROWS: 6-8 REPS EACH SIDE
+
RING SINGLE ARM BICEP CURLS: 6-8 REPS EACH SIDE
4 ROUNDS
Module 157: Ring Single Bicep Curl
On-Demand
RING SINGLE ARM ROWS: 6-8 REPS EACH SIDE
+
RING SINGLE ARM BICEP CURLS: 6-8 REPS EACH SIDE
4 ROUNDS

Module 158: Steel Mace 1H Figure 8
On-Demand
10 REPS EACH SIDE
4 SETS
34
RSM Advanced Workout #6
Module 159: Steel Mace Squat Complex
1 minute
·On-Demand
ALL = 1 REP Perform 3 REPS
3-4 SETS

Module 160: Steel Mace Back & Forth Lunge Uppercuts
On-Demand
3-5 REPS EACH SIDE
3-4 SETS

Module 161: Steel Mace Static Back Step Lunge 360s
On-Demand
MACE STATIC LUNGE 360s: 6-8 REPS EACH SIDE
+
MACE 360 SIDE STEP LUNGES: 6-8 REPS EACH SIDE
3-4 ROUNDS
Module 162: Steel Mace 360 Side Step Lunges
On-Demand
MACE STATIC LUNGE 360s: 6-8 REPS EACH SIDE
+
MACE 360 SIDE STEP LUNGES: 6-8 REPS EACH SIDE
3-4 ROUNDS
35
RSM Advanced Workout #7

Module 163: ear Crawls_ Side to Low Sweeps
On-Demand
BEAR SIDE CRAWLS TO LOW SWEEPS: 3 REPS (L/R=1REP)
+
HOLLOW ROCKING: PERFORM FOR 30 SEC
3 ROUNDS
Module 164: Hollow Rocking
On-Demand
BEAR SIDE CRAWLS TO LOW SWEEPS: 3 REPS (L/R=1REP)
+
HOLLOW ROCKING: PERFORM FOR 30 SEC
3 ROUNDS

Module 165: Ring Chin Ups
On-Demand
3 REPS
4-5 SETS
Module 166: Ring Top Dip Postion (Static Hold)
On-Demand
HOLD FOR 10 SEC
REST FOR 30-45 SEC
4-5 SETS

Module 167: Ring Leg Raises
On-Demand
3-5 REPS
4-5 SETS
36
RSM Advanced Workout #8
Module 168: Steel Mace 1H Figure 8
On-Demand
10 REPS EACH SIDE
3-4 SETS
Module 169: Ring Split Lunge Jumps
On-Demand
RING SPLIT LUNGE JUMPS
+
HOP TO CROSS
30 SEC ON / 45 SEC OFF
Switch Back & Forth between the two exercises
5 ROUNDS
Module 170: Dot Drill: Hop to Cross
On-Demand
RING SPLIT LUNGE JUMPS
+
HOP TO CROSS
30 SEC ON / 45 SEC OFF
Switch Back & Forth between the two exercises
5 ROUNDS
Module 171: Ring Elbow Strike Rows
On-Demand
RING ELBOW STRIKE ROWS: 10 REPS
+
MACE H2H ROTATIONAL SWING & CATCH: PERFORM FOR 30-45 SEC
5 ROUNDS
Module 172: Steel Mace H2H Rotational Swing & Catch
On-Demand
RING ELBOW STRIKE ROWS: 10 REPS
+
MACE H2H ROTATIONAL SWING & CATCH: PERFORM FOR 30-45 SEC
5 ROUNDS
37
RSM Advanced Workout #9
Module 173: Steel Mace Walking H2H 10&2
On-Demand
WALK 10-15 YARDS & BACK
3 SETS
Module 174: Steel Mace Pikes
On-Demand
3 REPS EACH SIDE
3 SETS
Module 175: Ring Top Dip Postion (Static Hold)
On-Demand
2-3 REPS
3 SETS

Module 176: Ring Hip Hinge to Rock Bottom Push Up
On-Demand
3-5 REPS
3 SETS
38
RSM Advanced Workout #10

Module 177: Steel Mace H2H 10&2's Side Lunges
On-Demand
3-5 REPS EACH SIDE
3-4 SETS
Module 178: Steel Mace Static Back Step Lunge 360s
On-Demand
6-8 REPS EACH SIDE
3-4 SETS

Module 179: Steel Mace 3-D Lunge Flow
On-Demand
ALL = 1 REP Perform 3 REPS
3-4 SETS
Module 180: Steel Mace Thor Cossack
On-Demand
3-5 REPS EACH SIDE
3-4 SETS
39
RSM Advanced Workout #11
Module 181: Steel Mace 90/90 Get Up with 360s
On-Demand
1 REP (L/R = 1 REP)
3 SETS
Module 182: Ring Chin Ups
On-Demand
3-5 REPS
4-5 SETS
Module 183: Ring Dip
On-Demand
3-5 REPS
4-5 SETS
Module 184: Ring Leg Raises
On-Demand
3-5 REPS
4-5 SETS
40
RSM Advanced Workout #12
Module 185: Dot Drill: 2MIN Drill
On-Demand
30 SEC EACH / 15 REST
2 SETS
ALL = 1 SET
REST FOR 1-2 MIN
Module 186: Steel Mace 1H Figure 8
On-Demand
MACE 1H FIGURE 8’s: 10 REPS EACH SIDE
+
MACE AXE CHOP SWITCHES: PERFORM FOR 30 SEC
4 ROUNDS
Module 187: Steel Mace High Axe Chop Switches
On-Demand
MACE 1H FIGURE 8’s: 10 REPS EACH SIDE
+
MACE AXE CHOP SWITCHES: PERFORM FOR 30 SEC
4 ROUNDS
Module 188: Steel Mace Step Up to 360
On-Demand
MACE STEP UP 360s: 5 REPS EACH SIDE
+
MACE 360 BURPEES: 5 REPS (L/R=1 REP)
4 ROUNDS

Module 189: Dot Drill: 2MIN Drill
2 minutes
·On-Demand
30 SEC EACH / 15 REST
2 SETS
ALL = 1 SET
REST FOR 1-2 MIN
41
RSM Advanced Workout #13

Module 190: Steel Mace 1H 360s to Pikes
On-Demand
3-5 REPS EACH SIDE
3 SETS

Module 191: Ring Dip
On-Demand
3-5 REPS
4-5 SETS
Module 192: Ring Inverted Low Rows to Bicep Curls
On-Demand
3-5 REPS
4-5 SETS
Module 193: Ring Rock Bottom Push Up to Arm Fly
On-Demand
3-5 REPS
4-5 SETS
42
RSM Advanced Workout #14
Module 194: Steel Mace 360 Squat Pressouts
On-Demand
3-5 REPS EACH SIDE
3 SETS

Module 195: Steel Mace Balance Lunge 360 3-D Complex
On-Demand
1 REP (ALL 3 = 1 REP)
3-4 SETS
Module 196: Steel Mace Thor Pike Cossack
On-Demand
3 REPS EACH SIDE
3 SETS
Module 197: Steel Mace Overhead Walking Lunges
On-Demand
10-15 YARDS & BACK
3 SETS
43
RSM Advanced Workout #15
Module 198: Steel Mace 90/90 Get Up with 360s
On-Demand
1 REP (L/R = 1 REP)
3 SETS
Module 199: Ring Dip
On-Demand
3-5 REPS
4-5 SETS
Module 200: Steel Mace Tall to Half Single Leg Deadlift
On-Demand
3-5 REPS EACH SIDE
4-5 SETS
Module 201: Ring Chin Ups
On-Demand
3-5 REPS
4-5 SETS
44
RSM Advanced Workout #16
Module 202: Dot Drill: Criss-Cross
On-Demand
DOT DRILL:CRISS CROSS: PERFORM FOR 30 SEC
+
MACE 360 BURPEES: 5 REPS EACH SIDE
4 ROUNDS
Module 203: Steel Mace 360 Burpee
On-Demand
DOT DRILL:CRISS CROSS: PERFORM FOR 30 SEC
+
MACE 360 BURPEES: 5 REPS EACH SIDE
4 ROUNDS

Module 204: Steel Mace H2H Figure 8's
On-Demand
MACE H2H FIGURE 8’s: 10 REPS EACH SIDE
+
MACE H2H ROTATIONAL SWING & CATCH: PERFORM FOR 30-45 SEC
4 ROUNDS
Module 205: Steel Mace H2H Rotational Swing & Catch
On-Demand
MACE H2H FIGURE 8’s: 10 REPS EACH SIDE
+
MACE H2H ROTATIONAL SWING & CATCH: PERFORM FOR 30-45 SEC
4 ROUNDS

Module 206: Steel Mace High Axe Chop Switches
On-Demand
MACE AXE CHOP SWITCHES: PERFORM FOR 30 SEC
+
HOCKEY DYNAMIC CURL SHUFFLE HOCKEY SLAP SHOT: PERFORM FOR 30 SEC
4 ROUNDS
Module 207: Steel Mace Dynamic Curl Shuffle Hockey Slap Shot
On-Demand
MACE AXE CHOP SWITCHES: PERFORM FOR 30 SEC
+
HOCKEY DYNAMIC CURL SHUFFLE HOCKEY SLAP SHOT: PERFORM FOR 30 SEC
4 ROUNDS
Meet Your Coach

Coach Vaughn
Fitness Coach / Author
Coach Vaughn is from Palmdale,CA – based at Viking Valhalla Training Center providing professional one on one training for any goal. He has traveled all around the world learning from the best minds in the fitness industry and preaches his own craft before he teaches it. He’s a certified fitness & nutrition coach, StrongFirst Kettlebell instructor , Flexible Steel, Stick Mobility, and is a steel mace & club specialist. While the tools implemented at Viking Valhalla are unconventional; they all sync into one system to bring a new sense of awareness of how to move better, get stronger and more resilient in your life endeavors. He’s now published four ebook programs and paperback book for steel mace training to better educate people around the world.
Features
Chat Your Coach
Web + Mobile Apps
Leave Notes
Integrate Wearables
Get Expert Coaching